Page 1 of 3

Project Mutt, the SE transmformation update 9-14-14

Posted: Mon Mar 31, 2014 7:11 pm
by crash93ssei
You guys pretty much all know my SE so no need for an introduction. Now it is project time! The weather is finally starting to get a little bit nicer so it is time to get to work on it. Gave it a jump start and move it around to get it out of the nasty mud, engine hammering away of course :lol: The interior is just nasty still in it. Stained, broken pieces everywhere, and that nasty SE foam steering wheel I can't stand! Well, I picked up a 105,000 mile 2004 SLE back in November that had a tree fall on it and the interior is quite nice, tan though.

SO... with that said, here are the details.

Stage 1
Complete interior swap - Seats, dash, carpet, all interior panels, door panels, door handles... if you can see it it, it gets swapped.
ECC swap - I hate the base style push button climate control in the SE, it will now get electronic climate control. This involves swapping out the entire HVAC unit on the firewall as well as the dash wiring being different.
Complete drivetrain swap - Engine and transmission from the SLE will be swapped over to the SE.
HUD swap - GXP parts car has HUD, it will be swapped into the SE. Unfortunately this means that I will have to run with a black dash pad on a tan dash for a while, but whatever :lol:
Wiring swap - Along with all of this swapping going on, I am sure there will be some compatibility issues between a 2002 SE and 2004 SLE and maybe even the HUD from the 2005 GXP. To fix this issue before it even becomes an issue, basically the entire 2004 SLE wiring harness will be swapped into the SE to make sure everything fits.
GXP brakes - I have some GXP brakes hanging out, the SE seems like a great donor for them.

Stage 2
Stage 2 will be in the future, likely next spring / summer
Top swap - I still have a junk L67 from one of the cars I parted out a while back, top swap will be done.
Headers - Of course gotta have some extra flow for the top swap!

Stage 2.1, the possible extras
Cam - doing a top swap, might as well do a cam!
Suspension drop - No more stock height, gotta take it down low.
This spot reserved for who knows what....


That leaves us with where we started and finished off the day with.

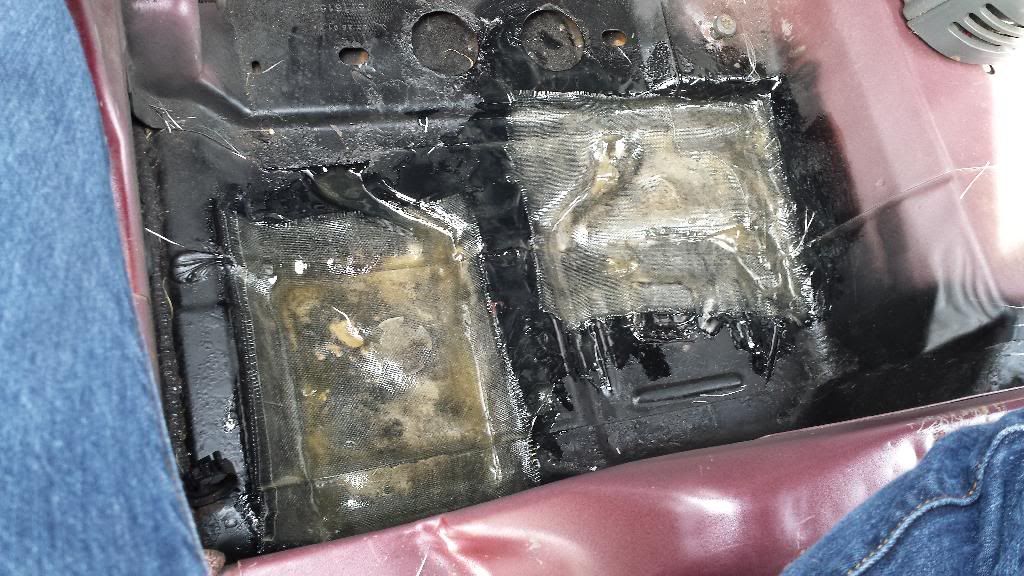
Pics of the SE interior, messy and became a catch all after the engine died.
Image

Image

Image


SLE interior, dirty and lots of glass, but will clean up nice!
Image

Image

Image

Image

Image

Image


I gutted just about everything in the SE.
Image

Image


Pile of parts from the SE
Image

Image

I swapped one door panel over so far, I can't wait to finish this up! Not sure why the pic turned out so funny, but the door panel looks really nice.
Image

Re: Project Mutt, the SE transmformation

Posted: Mon Mar 31, 2014 7:40 pm
by MattStrike
Got some surface rust to clean up from that floor pan there :poke: Git it now! :lol:

Good luck with the swap!

Re: Project Mutt, the SE transmformation

Posted: Mon Mar 31, 2014 7:57 pm
by crash93ssei
Yea, was going to comment on that but forgot :lol: yea, there was a few lakes under the carpet, they will be dried up and any rust taken care of before any carpet goes back in.

Re: Project Mutt, the SE transmformation

Posted: Mon Mar 31, 2014 8:45 pm
by nos4blood70
Lookin' good so far! Red on tan is classy!

How easy does everything come apart in the dash? Any special tools or contortionist positions required? I'm gonna be swapping out my dash harness soon.

Re: Project Mutt, the SE transmformation

Posted: Mon Mar 31, 2014 8:51 pm
by PRD2BDF
What about dying the black part of the HUD dash? I think Pat found a color that was a match to the tan in there.

Re: Project Mutt, the SE transmformation

Posted: Mon Mar 31, 2014 9:04 pm
by MattStrike
Faux leather wrap the HUD cover?

Re: Project Mutt, the SE transmformation

Posted: Tue Apr 01, 2014 6:54 am
by zuper8
ooo fun, can't wait to see more!

Re: Project Mutt, the SE transmformation

Posted: Tue Apr 01, 2014 12:29 pm
by gweg_b
Got a nice project ahead of you, Ryan!

It's a shame, we won't get to see your 7* of knock at cruise anymore. :lol:

This is going to be a nice car in the end, and think, you originally paid $500 for it!

Re: Project Mutt, the SE transmformation

Posted: Tue Apr 01, 2014 6:39 pm
by crash93ssei
No update today other then scoring a set of wheels for it. http://www.pontiacbonnevilleclub.com/fo ... 37089.html a local guy is selling his 2010 GT and has these wheels still, told me $100 for them (need one or two tires) and worked it out to trade a one step enhancement detail for them :)

Re: Project Mutt, the SE transmformation

Posted: Wed Apr 02, 2014 1:25 pm
by BonnieBoy08
Can't wait to see this one come together! Going to be 1 of a kind for sure!

Re: Project Mutt, the SE transmformation

Posted: Wed Apr 02, 2014 8:32 pm
by crash93ssei
Got to work on it for a few hours today, the SE is totally stripped down inside. Complete body harness removed, this is a pretty big job, stretching from the front impact sensor to the back bumper and then underneath the car to the back doors and along both sides of the body, the harness is huge! I also did find a problem.... rust! That spot on the rear drivers side floorboard actually has some spots rusted right through :( I have it cleaned up and hit it with some rust inhibiting paint and am going to patch the holes with fiberglass. This is not a major structural area so fiberglass should do the trick just fine. On to some pics!

Glad to have my cheerleader out to keep me company :) To think, just one week ago we were in the hospital and she was having a baby! Mia was sleeping and we had the window to our room open so we could hear her when she woke up.
Image

A little closer inspection of that nasty rusty area on the rear drivers side floorboard.
Image

Image

Passenger side floorboard
Image

Under the back seat
Image

Dash area / firewall
Image

At some point the rear window was broken out of this car, there was little glass pieces everywhere. Also, my rear defroster never worked... well, this explains it #-o The idiots that put the window in never plugged the defroster in on either side!
Image

Image

Part of the body harness goes under the hood to the fuse box, in the fuse box there is three sections. The body harness goes to the middle one, simply pop the clips to lift the box up and unscrew the middle bolt and it comes right out.
Image

Big grommet for the body harness through the firewall on the passenger side
Image

Body harness also runs through the drivers side of the firewall to this big plug located on the drivers side strut tower. it also goes to the cruise control module, brake fluid level sensor, and front impact sensor just under the radiator.
Image

Here you can see the hole in the firewall for the grommet / wire harness.Image

Body harness going under the car from the drivers side.
Image

Image

While I was under the car I snapped a few pics of the rust and the rest of the under side. That rust really is the only bad spot, the rest of the car is still really clean.
Image

Image


Here is the complete body harness, out in all it's glory!
Image

Rust cleaned up really good with a wire brush on my drill
Image

After cleaning it up really good, I hit it with some paint to prevent more rust in the immediate future.
Image

Image

Body harness all bundled up and sitting next to one of the front seats just for size comparison.
Image

Image


I think I will snag some fiberglass after work tomorrow or Friday then fix that spot up over the weekend. So far the project is coming along nicely and I am very happy!

Re: Project Mutt, the SE transmformation 1st update, SE stri

Posted: Wed Apr 02, 2014 9:55 pm
by KelvinVV
Wow! Going to look great when its done!

Re: Project Mutt, the SE transmformation 1st update, SE stri

Posted: Thu Apr 03, 2014 9:09 am
by 1oldman
DANG!!! Gonna be "lookin good" when done. Can't wait to see the finished "product" - BC

Re: Project Mutt, the SE transmformation 1st update, SE stri

Posted: Thu Apr 03, 2014 1:30 pm
by Zeik75
Should be a nice car again when its done. Is the fiberglass a permanent fix, or more temporary like on the gas door rot fiberglass fixes?

Re: Project Mutt, the SE transmformation 1st update, SE stri

Posted: Thu Apr 03, 2014 1:59 pm
by crash93ssei
This should be much more permanent then fixing the gas door with fiberglass. With this I have full access to the top and bottom to make sure all the metal is clean and free of any rust before starting then I can also completely and thoroughly cover both sides with a good rust inhibiting paint to prevent any future issues. With the gas door there may be some areas still inside that you can't access to make sure the metal is covered after the repair. I really think though that if done right a fiberglass gas door rot issue could be a permanent fix if it was taken care of down the road.

Re: Project Mutt, the SE transmformation 1st update, SE stri

Posted: Mon Apr 07, 2014 7:45 pm
by crash93ssei
Got some fiberglass to play with today, first time messing with fiberglass, I think it turned out good. Cleaned the paint off to bare metal, brushed resin on, one layer of cloth, more resin, another layer of cloth, more resin then done. The bottom will be cleaned good and painted with rust inhibiting paint.

Image

Image

Image

Image

And also this :) please ignore the monster truck stance. Quick struts with too tall springs on the front from previous owner as well as the car hasn't been rolled or anything after wheel swap so suspension is jacked up. All will be fixed before it is done! Wheels will likely end up being gloss black.
Image

Image

Re: Project Mutt, the SE transmformation update 4-7-14

Posted: Tue Apr 08, 2014 3:08 pm
by nishnobguad
Wow you sure did put alot of work into this car! It really shows too! Looks awesome can't wait to see more.

Re: Project Mutt, the SE transmformation update 4-7-14

Posted: Tue Apr 08, 2014 6:30 pm
by gweg_b
Coming along nicely!

Ryan, you're reminding me of how much I need to gut my interior again, but that was something that didn't thrill me the first time I did it! :lol:

Re: Project Mutt, the SE transmformation update 4-7-14

Posted: Fri Apr 11, 2014 11:32 pm
by crash93ssei
The '04 SLE is completely gutted, wire harness is pulled from all the nooks and crannies and is sitting inside the cabin just waiting to pop it out. The fiberglass patch work on the SE seems like it went very well, looks to be sturdy and should last a good long time without issue. All of the SE interior is being stored until it will either be sold for dirt cheap or scrapped and now the SLE interior is sitting in the SE, but not bolted down or anything just yet.

Pics / notes from today.


With all the broken glass in this car, the leather seats really need to be cleaned up good. If there is any glass left on the seats it could cause a glass sliver but that isn't such a big worry as glass ON the seat is easy to see and clean. The big worry is the glass fragments that are tucked inside the stitching and creases of the leather, this is VERY important to remove or eventually it will cut through the stitching and leather. I cleaned it all up with a thin stiff brush and my shop vac.
Image

Image

Carpet wasn't actually that dirty for the most part, but again there was tons of glass, and some areas of major staining, all of which will be taken care of.
Image

Image

Image

Comparing the SE HVAC unit with the dual zone SLE HVAC unit, SE on the left, SLE on the right.
Image

SE
Image

SLE
Image

SLE completely gutted.
Image

SLE goodies now temporarily sitting in their new home.
Image

Image


Next up will be wire harness install, HVAC unit install, all interior pieces cleaned to like new condition, carpets and floor matts cleaned to like new then complete interior install. I will also be pulling the GXP dash to "borrow" the wire harness and HUD from it ;)

Re: Project Mutt, the SE transmformation update 4-11-14

Posted: Fri Apr 11, 2014 11:57 pm
by BonnieBoy08
Very nice progress! Looks like this should be ready to go by June no problem!