Page 1 of 2
Radio control caps.
Posted: Wed Dec 22, 2010 7:38 pm
by jonnevilleSSEi
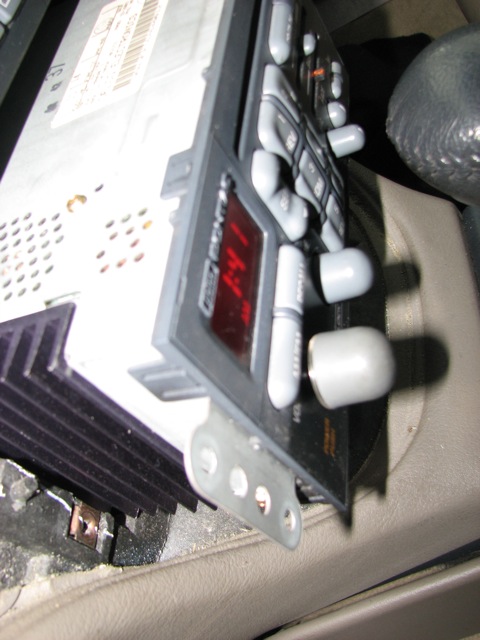
Can you even believe anyone would have left it in this manner? With NO GM official cap on the bass slide control. I know, it's enough to break your heart and I apologize to anyone offended by such an image blatantly exposed online in this manner. But maybe we can find help for it. If anyone has a cap for this poor crippled control please let me know. Also if you know where else I might find it.
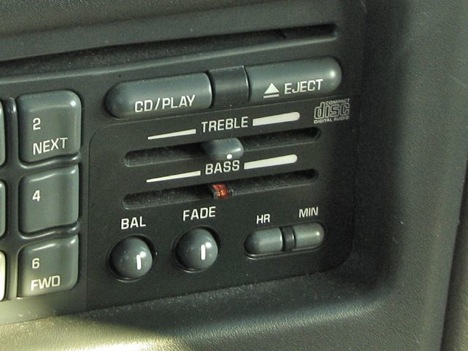 Detail of missing cap - the HORROR OF IT!!
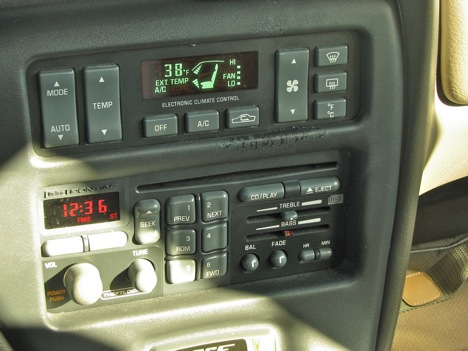 Pretty much makes the whole interior look funky doesn't it?
OK, bit of an exaggeration but I would be a more complete person if this had the original polished look as intended. In case it makes a difference this unit is part of a Delco Bose package. Sound is pretty good as long as the signal is there. Somehow it seems better geared to hiphop than to hard rock.
Re: Radio control caps.
Posted: Wed Dec 22, 2010 8:26 pm
by willwren
Your images aren't displaying.
Re: Radio control caps.
Posted: Wed Dec 22, 2010 8:28 pm
by enslow
I see two images.
If you made a mold of the first cap, could you make a new one?
Re: Radio control caps.
Posted: Wed Dec 22, 2010 8:30 pm
by willwren
Please try a wrecker for the BOSE cover plate.
Images are not displaying for me.
Re: Radio control caps.
Posted: Wed Dec 22, 2010 8:32 pm
by enslow
OK, now they're not. But I did seem them the first time.
Re: Radio control caps.
Posted: Wed Dec 22, 2010 8:44 pm
by wake
working for me
Re: Radio control caps.
Posted: Wed Dec 22, 2010 9:07 pm
by willwren
They are now. Might I suggest a better image hosting site? Photobucket. It's free. Use it.
Re: Radio control caps.
Posted: Wed Dec 22, 2010 9:19 pm
by enslow
Willwren,
I'm not sure if it was his image hosting site or not, but my whole internet connection got really slow when his images were not loading up. I have no idea how good his site is. Personally, I do find Photobucket rather awkward to use. Either that or I'm getting old and non-computer-friendly. If Stormdesigns is worse, it must be pretty bad.
Re: Radio control caps.
Posted: Wed Dec 22, 2010 9:32 pm
by willwren
It was a server issue at the image host. Please try a more reliable host (back on topic).
Re: Radio control caps.
Posted: Wed Dec 22, 2010 9:52 pm
by jonnevilleSSEi
Larry, While molding a set of caps isn't way out of the range of what I could do, it ain't happenin'. That would just take too much time and molding custom plastic parts might qualify me as being neurotic for what is essentially a non-collector daily driver with 95k on it. If I needed to I could pull it and use some rubber mold paste and craft something that would work. I'm hoping for a link to a good source of new or used parts. I've used Rock Auto and may check them but I've had REALLY bad luck with them regarding front headlamps. The lamps look fine, perfect from the outside but the light patterns that came out were almost comically (You can't be serious!!??) bad. I The headlamp RockAuto sent me for a 99 Regal made it hard to drive at night it was so distorted. Like I was following a flying invertd glowing "V" everywhere and then it burnt out after a year (and it was the fixture, not the lamp itself!) don't think that could happen for radio control slider caps, but I also don't think they have radio slider caps. Anyone know of good sources or can suggest anything from the resources links on Pontiac Bonneville Club.com?
As I posted elsewhere I have my own hosting company and generally it provides fast, solid services. I detected some slowdowns earlier this evening when uploading, that is extremely rare and appears to already be resolved. There may be other IP exchanges involved, if issues continue, please let me know so I can alert my server admin to investigate it.
Re: Radio control caps.
Posted: Wed Dec 22, 2010 10:09 pm
by willwren
Get the replacements from a wrecker, or PM harofreak00 and ask if he has any spares. The wrecker should always be your first option for any parts like this, the trim piece for the turn lever, or the speaker cover.
Re: Radio control caps.
Posted: Thu Dec 23, 2010 2:38 am
by enslow
jonnevilleSSEi wrote:...molding custom plastic parts might qualify me as being neurotic...
As I posted elsewhere I have my own hosting company and generally it provides fast, solid services. I detected some slowdowns earlier this evening when uploading, that is extremely rare and appears to already be resolved. There may be other IP exchanges involved, if issues continue, please let me know so I can alert my server admin to investigate it.
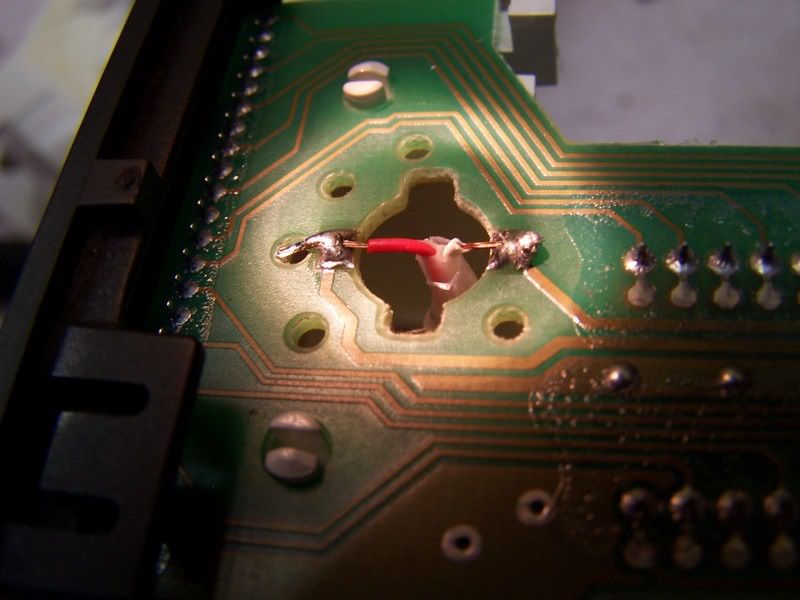
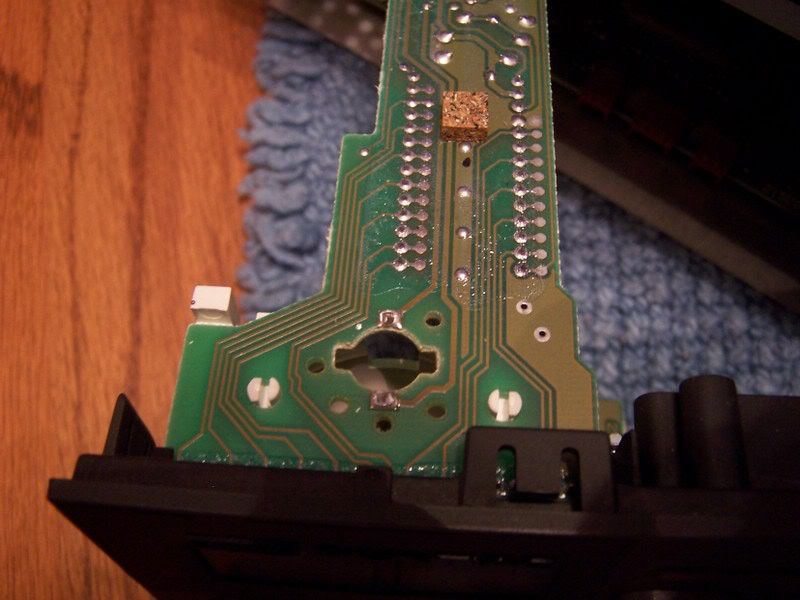
1. You're not neurotic like me?

I once pulled apart my digidash to fix a faulty ambient temperature reading. In the end it turned out to be a useful venture as I found several cold solder joints. But I'm sure some would have considered me neurotic. I also dismantled my multifunction switch from my Grand Marquis to clean all the contacts.
http://s868.photobucket.com/albums/ab246/preludefugue/
The things I do for fun.....
Anyway, finding a replacement at a junkyard is probably the better route!
2. I don't think it was your site that was slow. I have been experience slowdowns throughout the day at various sites.
Re: Radio control caps.
Posted: Thu Dec 23, 2010 9:20 am
by bsan63
I have a few spares. PM me and I'll throw a couple in an envelope.
Re: Radio control caps.
Posted: Fri Dec 31, 2010 10:23 pm
by jonnevilleSSEi
OK, got Caps, I was about to "slide" em on then I realized it isn't (sigh... ever) *that* simple. So apparently doing this correctly will require that I remove the radio fascia, replace the cap and then the fascia. So my question for the group is where to get started with that little project. Seems like the bezel which surrounds the radio and hvac control panel may just "pop" off. (though I hate finding out the hard way that wasn't true) After that I'd suspect the radio faceplate is attached with threaded fasteners of some variety or that the radio must be removed and then the radio faceplate can be removed. Of course there may be workarounds but if it won't be too much trouble I'd prefer to do it correctly. I'm guessing someone may already have info on here about removing the dashboard bezels and such, if anyone knows of such a thing please link to it or suggest away.
"why is it true that every little thing always turns into a project?"
Re: Radio control caps.
Posted: Fri Dec 31, 2010 11:36 pm
by sonoma_zr2
pull off bezel that surrounds radio, yes it goes all the way to left under the light switch. start at top right and work your way left, then right and down. they are friction tabs.
4 screws to remove the radio
faceplate has tabs on all sides and it pulls forward
I can get you better pics if you want them.
Re: Radio control caps.
Posted: Sat Jan 01, 2011 10:40 am
by jonnevilleSSEi
Thank you Sonoma, I think the description will be adequate. I wish I didn't have other plans or I'd do this today. One good thing that will also come from this is that the large dash bezel had some of the finish rubbed off, once I know it's easy to remove and replace that I can address refinishing that.
Re: Radio control caps.
Posted: Sun Jan 02, 2011 8:09 pm
by jonnevilleSSEi
Well, what I wanted was a new cap on that button (looks like a 10 second thing) what I got (so far) is "learning experience". Here is the take so far.

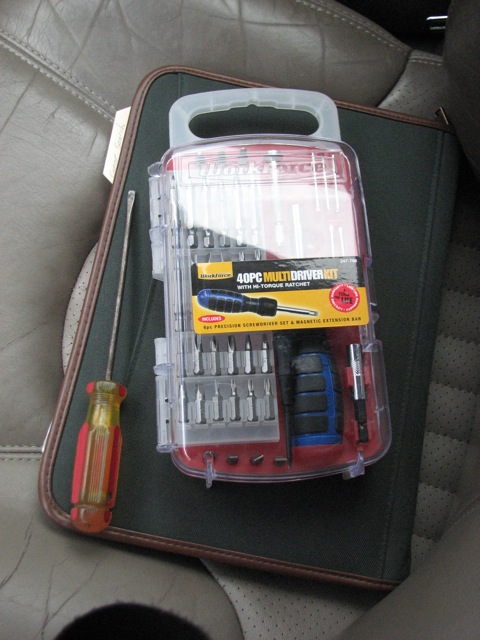
All the tools I think I require (and lots more actually)
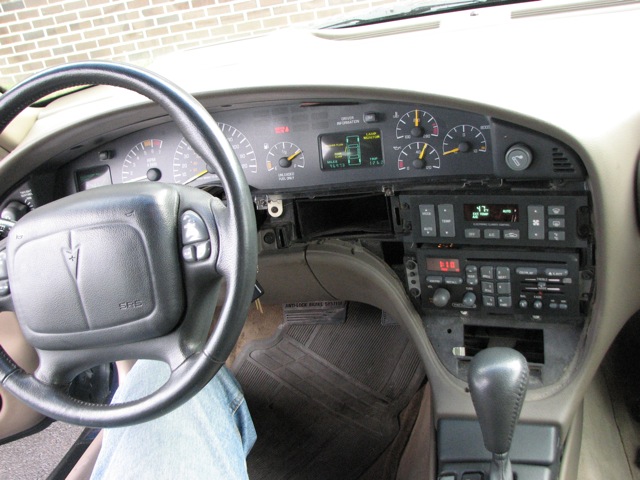
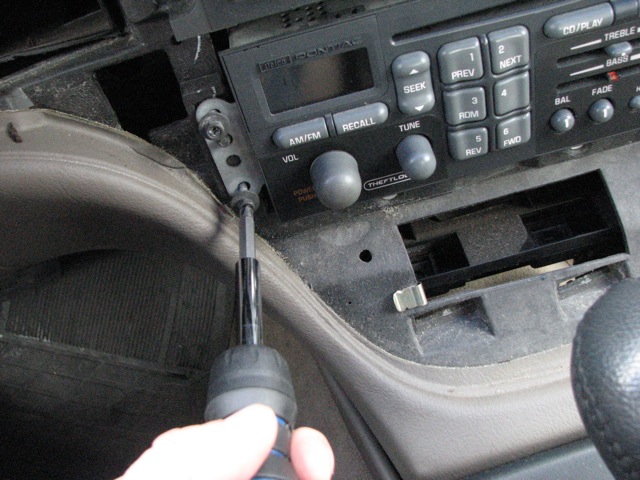
1. Remove the dashboard bezel, pretty easy once you know what it feels like. As described start in the upper right corner, wrap fingers behind and tug and you can feel the pressure fitting points release. Once you know where they are (see next image) it's easy but also be careful when you take it out not to scratch anything, (metal clips near a LARGE clear-plastic instrument cover) it only comes out one way, top first, and requires a slight bending of the part.
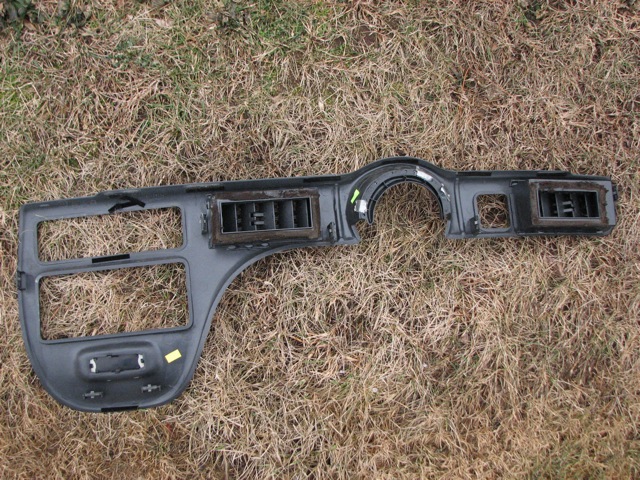
This image shows the bezel out of the car. The 7 tabs are located (1) middle right edge, (2) on each side about 1 inch from the steering wheel opening, (2) one on each outside of HVAC vent, (2) at bottom on right side. Looks like I will be replaceing the dead foam padding around the vents soon too.
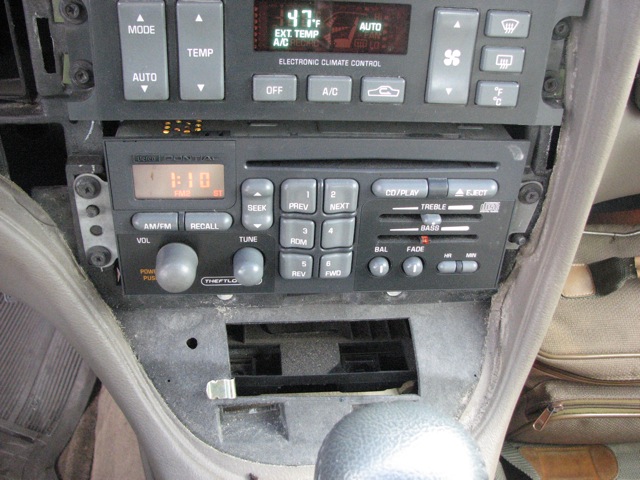
2. OK, so now we can see the 3 Phillips head screws and two alignment posts that secure the radio. I knew what do do from here.
3. This is where it got tricky. (see above how
EVERYTHING becomes a project) Once I pulled it out I discovered a few things.
Not easy to work on or remove the unit.
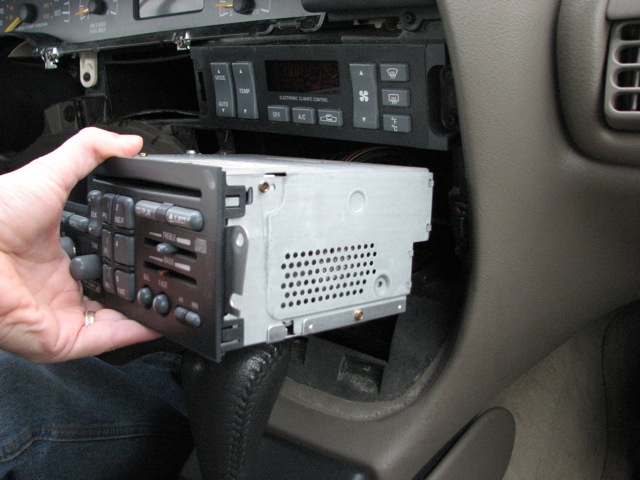
a. There isn't a lot of leeway in the cables so it's not really possible (as far as I could see) to pull the radio out far enough to clearly see what's going on behind it or to get a secure grip on the cables to yank them. Because of the lack of extra cable the radio fit is extra snug. I was handling it with extra care both in removal and replacement. If there was more cable I'd have been more comfortable trying to remove the faceplate without removing the radio from the connections, but this makes it tight quarters. This image shows the radio extended near the limit of the factory wiring. Thanks for the leeway GM! I'm sure another 10 inches of cable would have upset the shareholders
tremendously.
b. My thought here is that it's probably safe to give the cables a good yank so I can remove the whole unit from the car, but out of concern for the cabling and stereo etc. I decided not to push my luck here.
I felt like I should ask first of someone whose been here before.
Is it safe to just yank on these things? Also I intend to add an iPod/MP3 player jack. If I knew which one of these was the power line in that would be good too.
Radio Tabs aren't releasing the fascia as easily as suspected.
c. Those tabs mentioned earlier (if these are them) don't come off easily, at least not from this awkward still in the vehicle position.
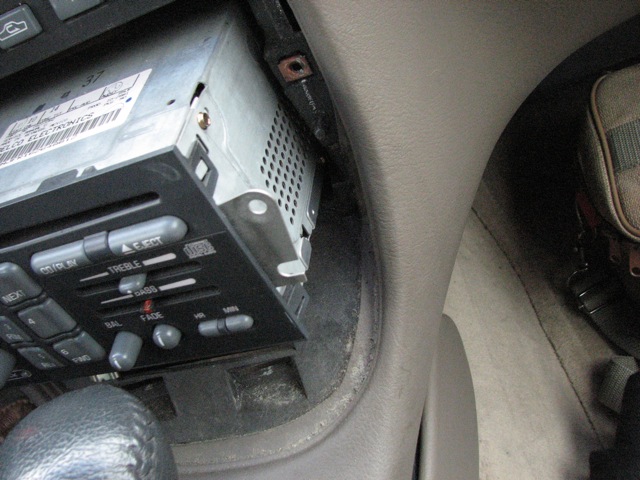
I tried to manually unclip them and can't seem to get decent leverage from getting them all off at the same time. (and the disadvantages of not being an octopod once again become obvious - wouldn't it be awesome to have octpus arms but still have opposing digits? Boy would I productive!). There appear to be 2 clips on each side (8 total) and each looks slightly different in size and function.
When I tried to remove the facia from one side it felt like it was still trying to stay on in the middle and I am concerned that yanking that off would cause damage to the radio or faceplate. It felt like even though the one corner was off and lifting, there was soemthing behind the faceplate near the tuning buttons that wasn't letting the faceplate even slide half off.
Also, because this has a Delco-Lock I am aware that certain actions on the stereo could disable it so I am even a bit concerned about removing it from power and then needing to learn how to reset it. (another
project right?)
So I returned it to the previous state.
So at this time knowing that I have determined how to get the radio out of the dashboard in well under 5 minutes I decided I should come back here and see what the experts advise as I can get back to where I was, easily and quickly enough next time around.
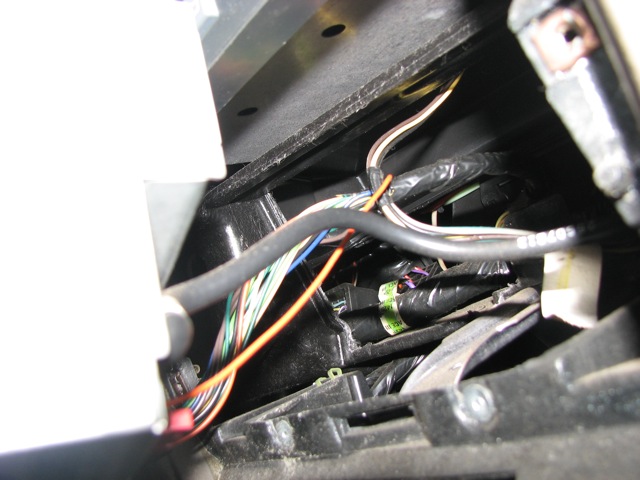
So here's the current dilemma. Do I just grab those two wire sets (one has a skinny red wire leading into a connector, this one has an obvious locking clip and removes easily) (does anyone KNOW if this is the power line?) The other one must be the speaker wires and steering wheel control connections because it has about 10+ wires in a bundle. I put medium pressure on it to try and remove it from the radios back but it wasn't budging, I saw no locking clip, Am I not seeing a locking clip or do I just need to apply more pressure to unseat the connector?) I can also describe this better, the clip as it seems to be half white and half black, might be two clips that interlock? One for speaker cables the other for the wheel controls.
As far as the side clip/tabs that hold the front of the radio on. Is there something else that could be holding the faceplate on in the middle or has anyone else removed this and determined it also is just a matter of confidently knowing it is engineered to bend and won't break?
d. Not to mention that the radio dial lamp has already shown some flickering behavior (a loose connection somewhere) so I am trying not to push my luck there either. Sadly I've also seen a couple of incidents of the LCD's misfiring and station ID"s or time doesn't display correctly but that has so far always corrected on the next "auto-reboot".
So I replaced the radio and bezel and it's all back like it was before. Seeking advice before I risk ripping off the facia and ruining it or messing up the wiring by trying to yank something that has a hidden clip or technique. ~Thanks.
Re: Radio control caps.
Posted: Sun Jan 02, 2011 10:20 pm
by sonoma_zr2
All of the wire connections on the back of the radio just pull out. Yes, there are release tabs you squeeze while pulling. The facia tabs have to be lifted one at a time, the facia pulled forward enough to keep the tab from going back into the slot and move on to the next one. Almost impossible to do while in the car, remove the 3 connectors and the antenna.
Re: Radio control caps.
Posted: Mon Jan 03, 2011 6:56 pm
by 00Beast
I totally see why GM went with the dock and lock wiring 00+, and used the metal clips to hold the HU in. Removing my HU is a 5 minute task that involves a pen and a flat blade screwdriver.
Re: Radio control caps.
Posted: Mon Jan 03, 2011 11:48 pm
by human
This project seems to have mushroomed from simply replacing the cap, which slides on and off. Is the bass slider broken off? What exactly are you trying to accomplish with this project? Rather than rebuild the existing radio, maybe it would be easier to find another stock radio. They sell pretty cheap at the junkyard. I got one a couple of months ago for $16 with a 30-day replacement warranty.
Taking the radio out is really very easy. It took me all of three minutes to take the radio out of my Bonneville the first time to get to the wiring harness when I installed the CD changer. I wouldn't yank the wires loose, but if the connector is a little tough to budge, just pry one side with a flat blade screwdriver until you dislodge it a little, then repeat the process on the other side and wiring connector will come right out.
There are two power leads in the wiring harness. The red one is switched through the ignition and the yellow one is constant to keep the clock going. The easiest way I've found to tap into these leads is to use crimp-on tap splice connectors. Just put the wires in, close it, and squeeze it with a pair of pliers.