Page 1 of 3
The retrofit begins...it's done!
Posted: Mon Feb 08, 2010 4:00 pm
by LeSabreUltra
Sort of. I just bought some 2.5" Audi A6 Hella d2s projectors in good shape off of ebay for about $60 including shipping. Since my car is going cross eyed for some reason I figure it's about time. This is going to be a long, slow process unfortunately, as I gather funds to make this possible. I have a long list of things I'm going to need.
I can't photoshop worth a crap, but here's a picture of my car to play "imagine the projectors" with:


Right now the basic plan is to place these newly acquired 2.5" projectors in the outer spots for the low beams (duh) and once I can find (and afford) a set of similarly proportioned halogen high beam projectors they will go in the inner spot. I don't really know how I'm going to do shrouds, or how the inner headlight will be painted (probably just black ?) so any suggestions there would be helpful.
I'm excited! I got spoiled by my truck's beam pattern and light coverage with it's ecodes v

...that a simple PnP HID kit just isn't cutting it anymore.
If all goes well, I should have a beam pattern like this (car on left)

I hope so anyway.
I still need OEM d2s ballasts and bulbs, as well as the aforementioned halogen projectors and a bunch of other stuff...but it's a start.
Comments and suggestions would be great. This is my first retrofit.
.
.
.
Re: The retrofit begins!
Posted: Mon Feb 08, 2010 4:09 pm
by 00Beast
I don't see a pic on the bottom, just get "Image Hosted by tripod".
Sounds like its gonna be a fun project!!!
Re: The retrofit begins!
Posted: Mon Feb 08, 2010 6:59 pm
by LeSabreUltra
Oops, fix'd!
This is a stock photo of the projectors I'm getting, I'll take better pics when I get them.

Forgot to mention earlier that I'd also like to wire the headlights so that the low beams stay on with the high beams, thus putting less stress on the ballasts and avoiding disappointment when the HIDs turn off!
I'm hoping to make this thread sort of a handy how-to guide for people (like me) who have never tried this before.
.
.
.
Re: The retrofit begins!
Posted: Mon Feb 08, 2010 9:08 pm
by J Wikoff
I've never really looked at LeSabre headlights. Are those Bonneville reflectors in different housings?
Re: The retrofit begins!
Posted: Mon Feb 08, 2010 10:23 pm
by wake
i believe so

Re: The retrofit begins!
Posted: Mon Feb 08, 2010 10:38 pm
by wjcollier07
J Wikoff wrote:I've never really looked at LeSabre headlights. Are those Bonneville reflectors in different housings?
It's not that you've never looked..I've personally never seen any with lenses you can see through!
Re: The retrofit begins!
Posted: Mon Feb 08, 2010 10:53 pm
by LeSabreUltra
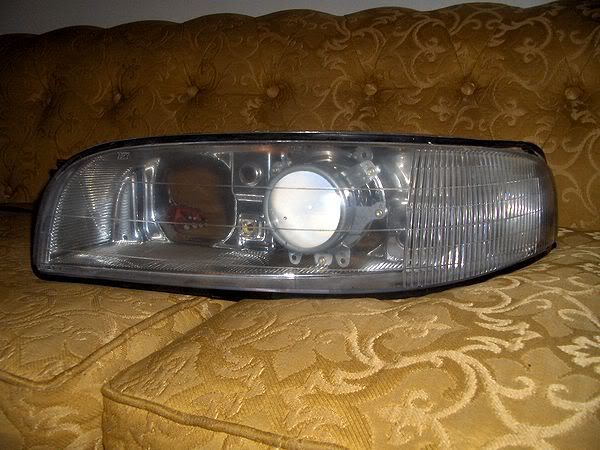
John has a very good point, they fog over so fast it's ridiculous! Headlight restoration kit helped a bunch, and will help even more with these projectors.
However I can't say for sure if they are the same or not. I don't think so but I don't know for sure. Maybe if someone had a closeup pic of a Bonneville headlight?
.
.
.
Re: The retrofit begins!
Posted: Tue Feb 09, 2010 12:02 am
by LeSabre in Buffalo
Why get projector highs? A set of HIR bulbs would put out 2400 lumens and be a lot less work/cost than projectors.
It wouldn't look anywhere near as cool, though.
Re: The retrofit begins!
Posted: Tue Feb 09, 2010 12:24 am
by LeSabreUltra
Well, I thought about that and you're right, it would be a good option as well, and certainly a lot less involved. I'm just not sure how well the reflector would function, how stable it would be, and if the aiming mechanism would still function with half the reflector cut off. I'll have to look at it closer once the headlight is apart.
.
.
.
Re: The retrofit begins!
Posted: Tue Feb 09, 2010 8:49 am
by LeSabre in Buffalo
Projector weight vs. bulb weight.
My guess from having my headlights apart is the aiming would be functional if you cut the reflector bowl and left the top and bottom of the reflector bowl in place. Whether it would aim correctly is another story.
Re: The retrofit begins!
Posted: Tue Feb 09, 2010 11:19 am
by LeSabreUltra
Yeah, that's the issue I'm wondering, is if I retain the reflector how well is it going to be able to aim the high beam?
The projector itself I'll have to fab up a custom mounting/aiming strategy. I like this basic idea for it's simplicity:


The three bolts both hold the projector in place and allow it to be adjusted independently of the rest of the headlight. More than likely I would attach it to the headlight housing itself because as you say, I'm not sure the reflector could hold the weight of the projector.
If I do end up going with high beam projectors (would really like to, but we'll see) then these are the ones I will most likely get:
http://www.focuztech.com/product/60mm-H ... -beam.html
As you can see, they are 9005 projectors, which means they can also use the 9011 HIR bulb. Could you imagine a relayed HIR projector high beam?

It may not attain the levels of true Bi-Xenon brightness but it would for sure be really freaking bright.
If I were to do that, I would use a similar mounting strategy to the HID projector, giving me the capability of aiming the four projectors independently of both each other and the reflector inside. Which would take a lot of work, but give me a precise control over output. The reflector would remain just to make it look pretty, unless it ends up being a problem and I have to simply remove it.
hidplanet.com has a ton of good info, I've been researching a lot and getting ideas. Won't know for sure what will go down until the headlights come apart, though.
.
.
.
Re: The retrofit begins!
Posted: Tue Feb 09, 2010 11:05 pm
by LeSabre in Buffalo
To that basic idea: Add a steel mounting ring with holes for the bolts. That will give the mount more structural strength, and the bolts won't tear through the plastic headlight.
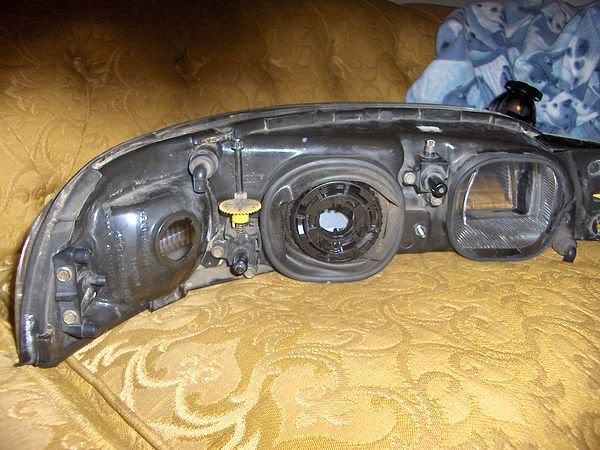
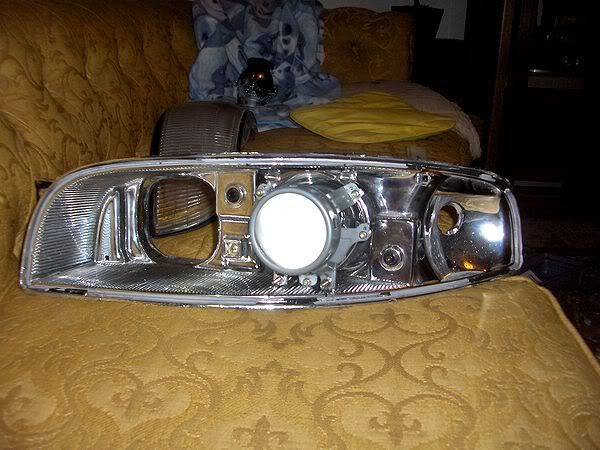
Dan, you may have to use the reflector anyhow since the back of the headlight is open and covered by a large rubber gasket. The bulbs mount to the reflector, as is seen in my pictures of the headlight.

Yeah, the condensation sucks.

Look closely, you'll see where the high beam bulb mounts. The low beam is the same. Also there's no structure behind there, just opening closed with gasket.
Re: The retrofit begins!
Posted: Wed Feb 10, 2010 1:20 am
by LeSabreUltra
Whoa, that's not how I figured it was at all. Thanks for the pics, they're giving me a better idea of what to expect.
Based on this, and providing I can get my driver's side aiming apparatus suitably un-borked, I'm thinking right now I'll go for the A6 projectors alone, with TSX clear lenses to give a razor sharp cutoff. I may do some shield mods but that could be beyond my ability at the moment.
Anyway, I don't think the reflector could support more than one projector easily. I may try to distinguish the projector by painting the low beam half of the reflector flat black, or I may leave it alone. I'm gonna have to see what it all looks like once I have everything and I can get a better idea. Projectors should be here in the next couple of days.
I will be using OEM new D2S bulbs for superior quality and brightness. But I have decided to retain my aftermarket ballasts and get an adapter to D2S for them. They have been nothing but perfect since I got them, and if it ain't broke...
I think for high beams I will do 9011 HIR with a relay as funds allow. That ought to augment the HIDs pretty well, assuming again of course, that I can get my driver's side aiming apparatus un-borked. If not I'll have to get a new headlight which will set me back a bit.
.
.
.
Re: The retrofit begins!
Posted: Fri Feb 12, 2010 1:51 pm
by LeSabreUltra
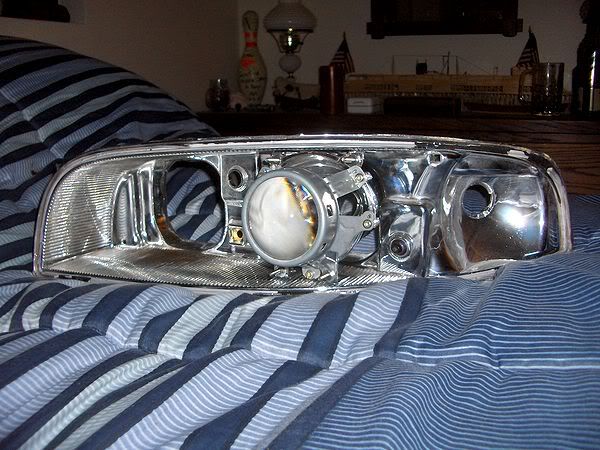
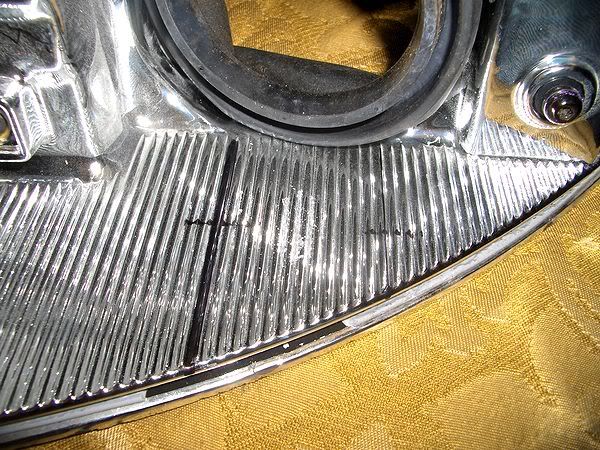
Teaser pic (test fit only).
Looks like I will be doing a dual projector setup after all. Projector is too big and the reflector is too small to mount onto!
More updates later.
.
.
.
Re: The retrofit begins!
Posted: Fri Feb 12, 2010 3:27 pm
by LeSabreUltra
Okay, very small update, but mostly a post to fill in the gaps to how I got there.
Decided to crack open a headlight last night.

Looks like I'm having headlight for dinner again...
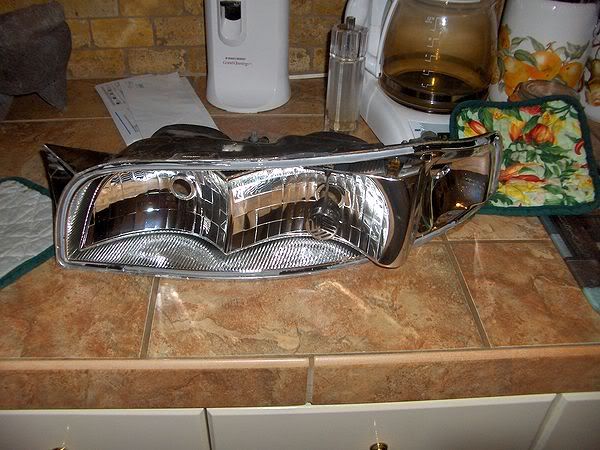
Cover off.
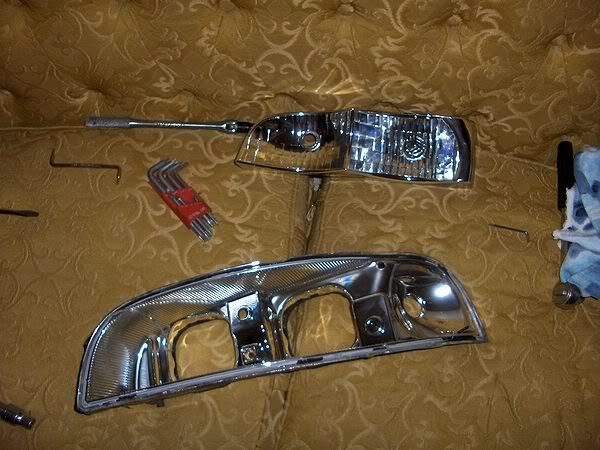
I found to my dismay that I cannot mount the projector to the reflector, it is far too large. So I removed it, and I'm going to mount it to the housing instead.
Which brings me again, to this test fit:
So now I have some new problems. The projector shown in place in the above picture is way too tight in there, I have no ability to adjust it. So this morning I took a dremel to a few spots to shave it flat on the top and bottom, and now it fits in with a little wiggle room. Should be plenty to adjust it left and right, and up and down. Problem solved.
However, because I had to remove the reflector, I now need projector high beams. This is good in the sense that dual projectors would look so much better, but bad in the sense that I now need to find a good halogen projector that is smaller than my A6's while having the same size lens so it doesn't look weird. I have a couple of good leads there.
Mounting is going to be weird at best. It looks as though I will have to use brackets and mount to the top and bottom of the housing for both projectors. I will need to use special "slider" brackets so that I can adjust the projector, preferably after the headlight is sealed but I'm not sure that's going to be possible. Either way, it looks like my dremel is going to have it's work cut out for it to get all this stuff to fit.
Not sure about the color scheme. I'd like to leave it all chrome inside because I think it would match my silver car better, but black would help to hide any weird markings or hardware that I leave behind from this. We'll have to see I guess.
.
.
.
Re: The retrofit begins!
Posted: Fri Feb 12, 2010 3:35 pm
by yourgrandma
Looking good so far. If you have mounting holes uin the projectors, you might be able to make a system for adjustment using them. Id make a tree point attatchment. One point solid mounted to the housing with a pivot (use springs), one on the top and one on the bottom, with bolt heads sticking out of the back side of the housing, sealed with grommets.
Thats how I plan to cram two E55s into my bike's headlight.
Re: The retrofit begins!
Posted: Fri Feb 12, 2010 7:03 pm
by LeSabre in Buffalo
Nice! I like how it looks!
The size of those projectors looks deceptively small. I wouldn't have guessed they were that large.
After seeing how the headlight is put together and especially the mounting points for the adjustment mechanism, it needs the dual projector setup. Retaining the reflector high beam would involve significant fabrication for an adjuster. Better to put a projector in since it needs less work.
Re: The retrofit begins!
Posted: Fri Feb 12, 2010 11:44 pm
by LeSabreUltra
Thanks and yeah, that is the impression I got once I popped it open as well. That reflector is a CHUNK though...it's really solid! It could hold the weight of two mini-projectors with no problem, which would make aiming incredibly easy, but then output would suffer.
Another mini-update.
I ended up buying a pair of halogen Audi A6's from a member of HIDplanet for the high beams, I think I can make them fit. $30 for the pair. They look very similar but the projector bowl is smaller, so they'll fit in easier. The lens looks exactly the same though so it will appear as though I have two identical projectors in my housing once I get some shrouds on it.
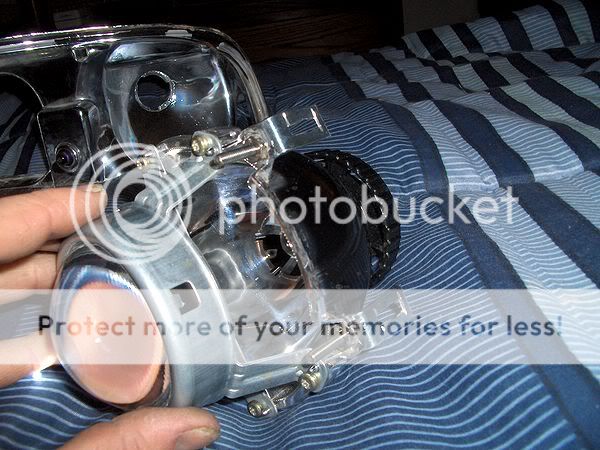
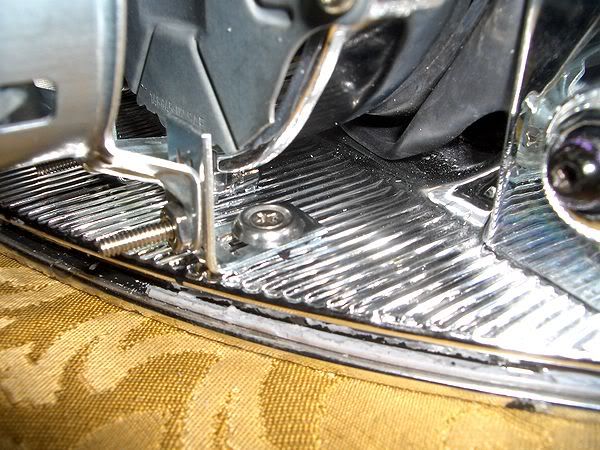
Also made progress on the retrofit itself. I made a prototype mounting strategy for one of the A6's.
In place. Not bolted down, just resting in there. It's REALLY tight, but I have enough range of motion that I feel I can aim it adequately.
My slider mounts on the top. These will allow me to move it up and down.
Closeup.
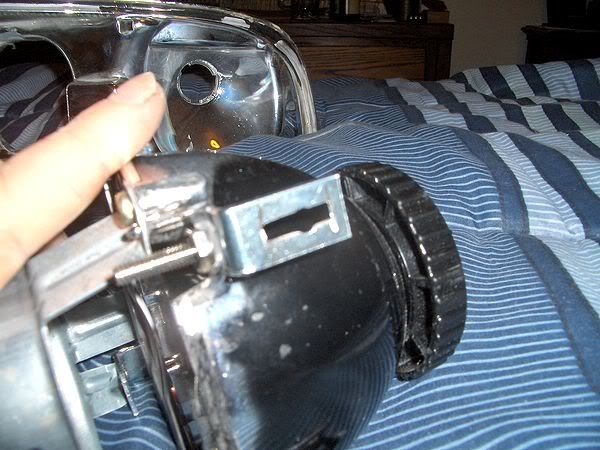
Bottom mounts. I need to notch these out and make them slider mounts too so I can have left and right motion.
I don't think I'll be able to make much further progress until my bulbs and adapters get here...bulbs are due on the 16th, but I haven't heard a word from DDM about the adapters. Hopefully they are on their way. Ordered on the 10th.
.
.
.
Re: The retrofit begins!
Posted: Sat Feb 13, 2010 10:38 pm
by Looong4
Nice work!
Re: The retrofit begins!
Posted: Sun Feb 14, 2010 2:08 am
by LeSabreUltra
Thanks, I actually believe the end is in sight! Just waiting on stuff...
I hate to keep wasting your time with all these tiny updates lol, but I am making progress. I overcame a few more hurdles today.
To start with, I figured out a way I could use the stock rubber gasket to seal the space at the rear of the housing around the projector. Hopefully this will work well enough.
Decided to go ahead and mount up my sliders...I checked and rechecked, and I have everything lined up just about perfectly, there's very little else I could do without the bulbs & adapters. So I went ahead and drilled and mounted.

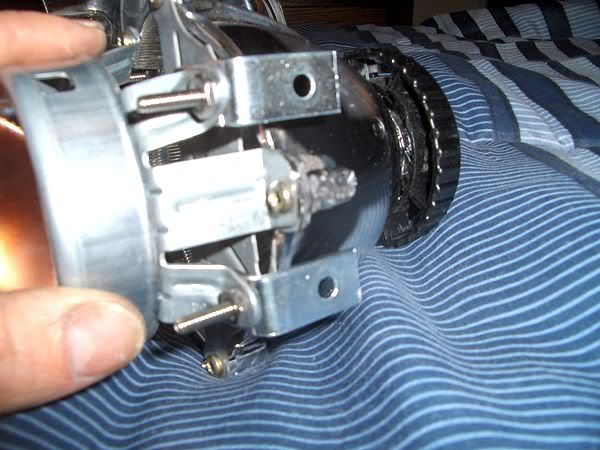
Mounted...
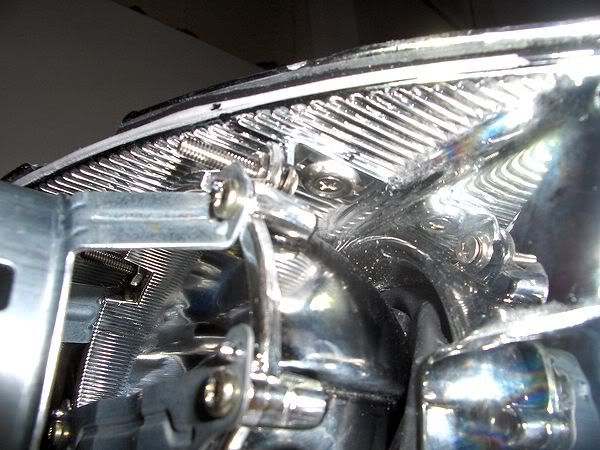
Unfortunately I was only able to use two out of the four mounting points due to space issues...but as I said earlier it is TIGHT in there. It barely moves on it's own without anything bolted down, with these in place I think the projector bowl would break before it would move. The entire assembly can be picked up by the projector and not move. Sounds sturdy enough?
I'll fill in the extra holes with RTV.
However with the bolts loosened it can be adjusted for horizontal and vertical alignment. Every measurement I've taken seems to indicate that I'm spot on with rotational, but we'll have to see.
Final test fit of the night, mounted.
I think I'm going to start work on the other side. I won't go into as much detail with it though, it will be the same as this one...
I can see the end, lol. I think I can pull this off very successfully. Only major hurdle I foresee is what I'm going to do about shrouds.
.
.
.