Page 1 of 1
Goodbye nylon coolant elbow. :)
Posted: Sat Dec 19, 2009 1:53 pm
by 95naSTA
This isn't really performance but since it involves a little modification, I decided to put it here.
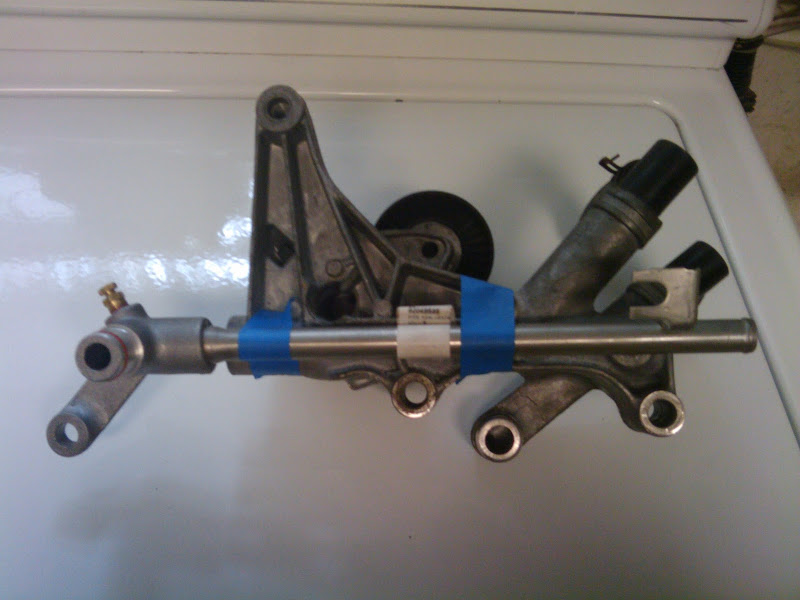
I just got these Aussie (GM/Holden) L67 parts with the intent of figuring out how to make them work on my L36/26:
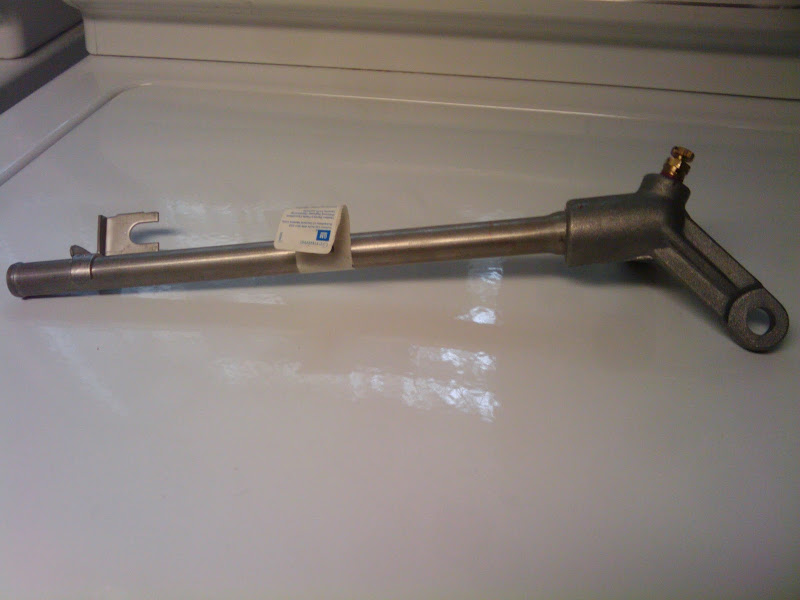
So, it's a cast aluminum elbow with a female end pointing toward the tensioner and a long stainless pipe that fits into the elbow.
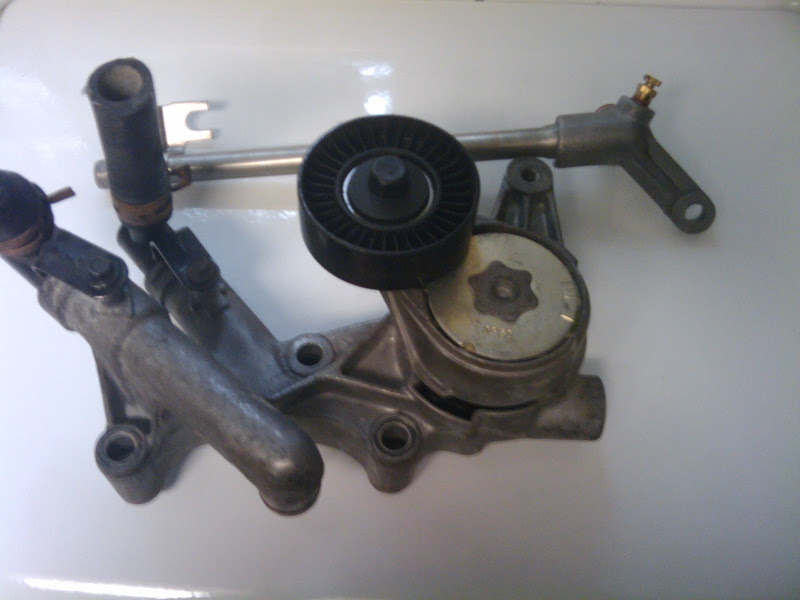
Turns out, just like the Aussie tensioner assembly, you can run that pipe right though.

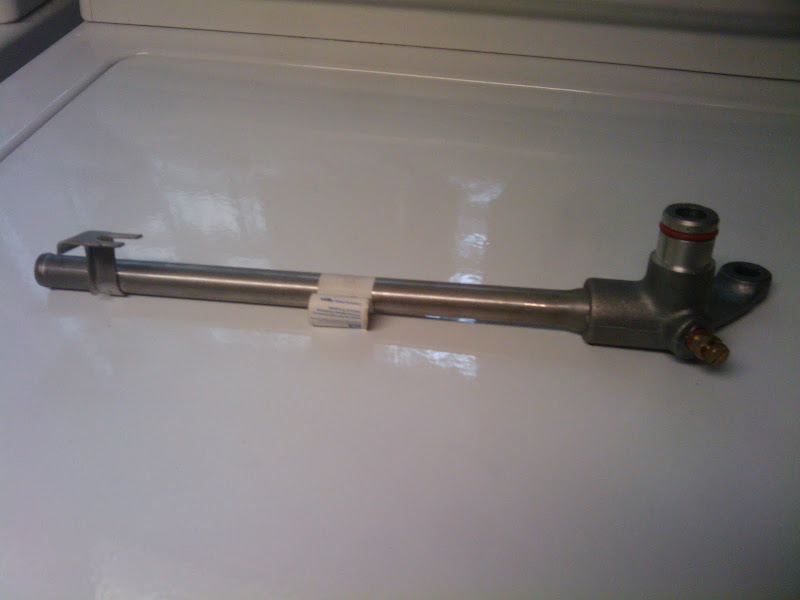
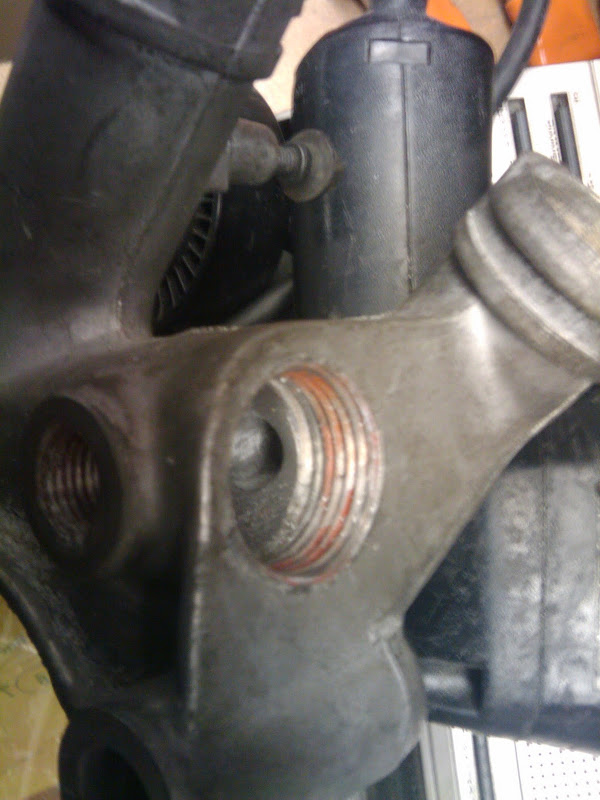
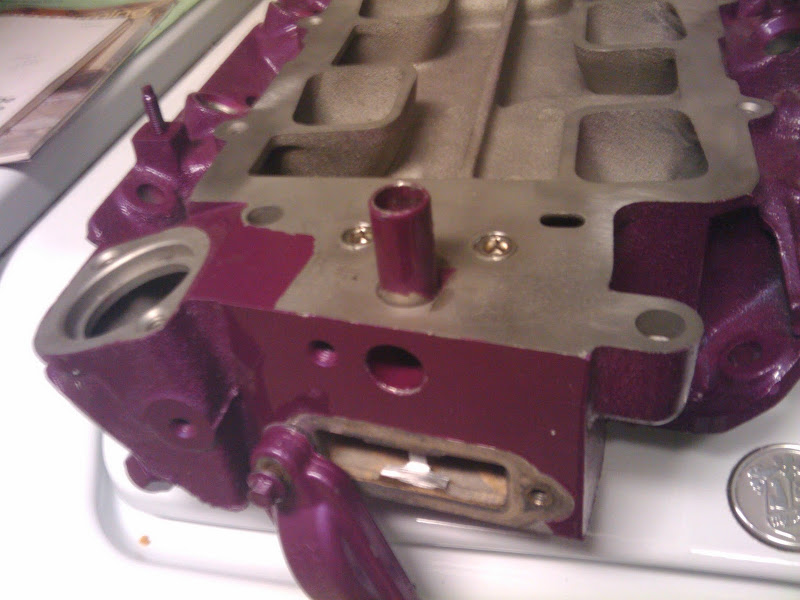
This plug just needs to be removed:

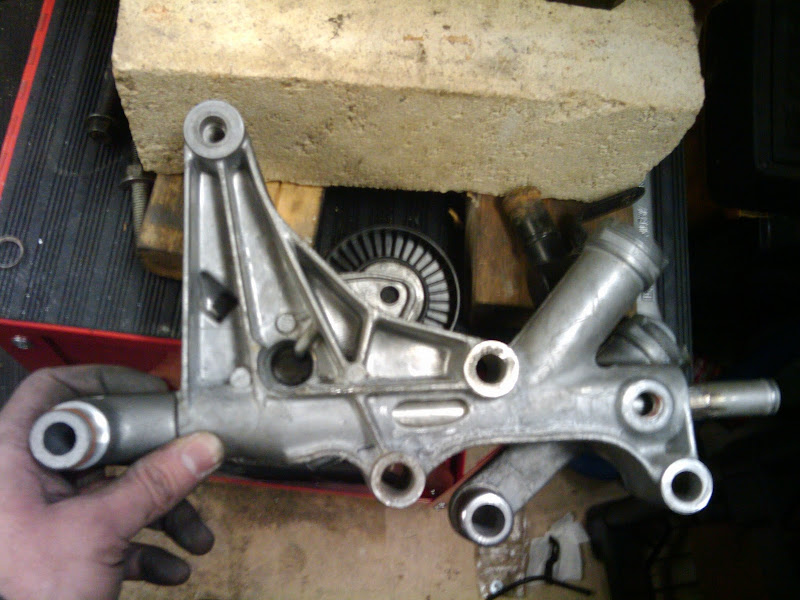
The tab on the SS pipe will need to be removed and the hook up to the heater hose will need to be relocated.
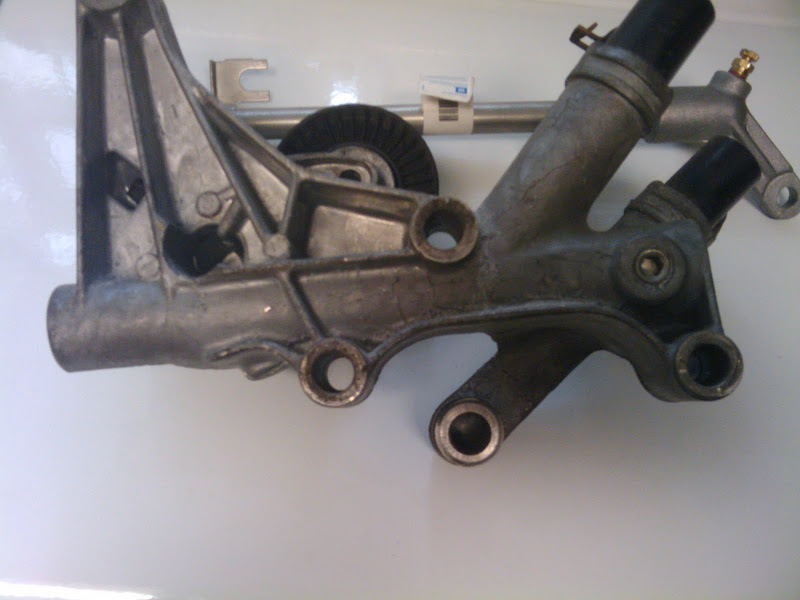
The coolant elbow tab that gets bolted to the block needs to be removed since it's one of the engine mount bolt locations. The bleeder needs to be removed too and the boss for it needs some grinder love.

This is all very easy stuff and it'll guarantee that I'll never have to deal with that crappy stock elbow again.
I know a few of you guys have never had any issue with your stock elbow. And I also know a few of you have, like me. I would rather not turn this thread into stock elbow install techniques. I just wanted to give people another option if they're sick of dealing with the stock one.
The GM Holden p/n for the elbow is : 92064283, and for the pipe it's 92048646
My parts were ordered by someone in Australia from
http://www.amcap.com.au and then shipped to me. I think you can just contact them and have the parts sent directly to you.
Re: Goodbye nylon coolant elbow. :)
Posted: Sat Dec 19, 2009 4:12 pm
by willwren
Very good solution. That's the last one you'll ever do, and I'm betting a few here have done more than one. Nearly every LIM gasket job I've done here (lost count) has had a failing or failed elbow.
What was the total cost of the solution?
Re: Goodbye nylon coolant elbow. :)
Posted: Sat Dec 19, 2009 5:35 pm
by grandprix104
I have been fighting with my leaking elbows for a year. I hope I finally fixed it last week but i'm not sure yet. If not I may need to look into something like this. I have replaced them 3 times now! >:[
Re: Goodbye nylon coolant elbow. :)
Posted: Sat Dec 19, 2009 6:33 pm
by GoldenBullet
Very nice, you gunna polish it up?
Re: Goodbye nylon coolant elbow. :)
Posted: Sat Dec 19, 2009 8:10 pm
by ptrfair
wow, good job! I never had that sorta problem, then again I must comment: I like your workbench as the Washer/Dryer in that photo above

Great use of appliances! haha
Re: Goodbye nylon coolant elbow. :)
Posted: Sun Dec 20, 2009 12:23 am
by 95naSTA
The parts were about $60 AUD before shipping and I opted for the faster shipping.
Yep the washer/dryer is where the photos happen. My 4t60-e is crowding up my work bench.
And, the plan is to polish it.
Re: Goodbye nylon coolant elbow. :)
Posted: Sun Dec 20, 2009 1:57 am
by 1fatcat
Does the bleeder valve hit the LIM?
Re: Goodbye nylon coolant elbow. :)
Posted: Sun Dec 20, 2009 5:52 am
by 95naSTA
Yes. And the boss for it.
95naSTA wrote: The bleeder needs to be removed too and the boss for it needs some grinder love.
Re: Goodbye nylon coolant elbow. :)
Posted: Sun Dec 20, 2009 11:30 am
by 1fatcat

Didn't see that.
Re: Goodbye nylon coolant elbow. :)
Posted: Sun Dec 20, 2009 9:19 pm
by 95naSTA
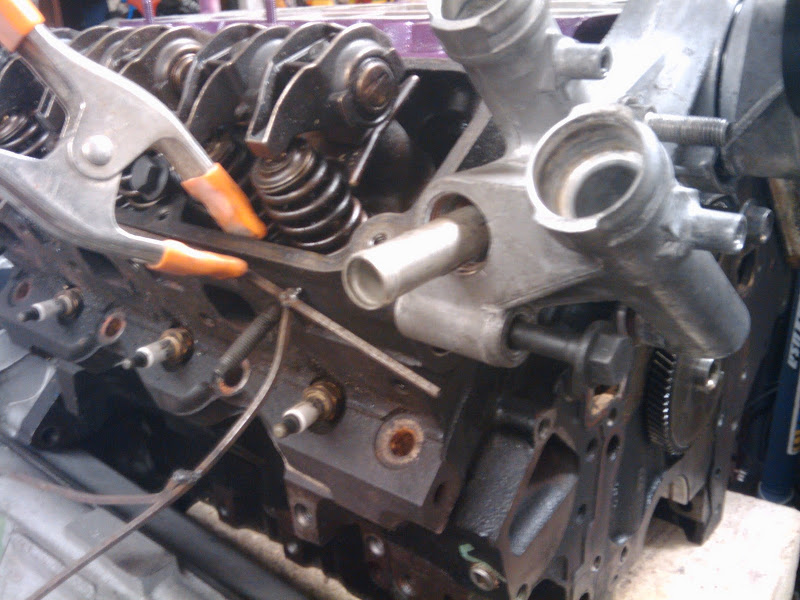
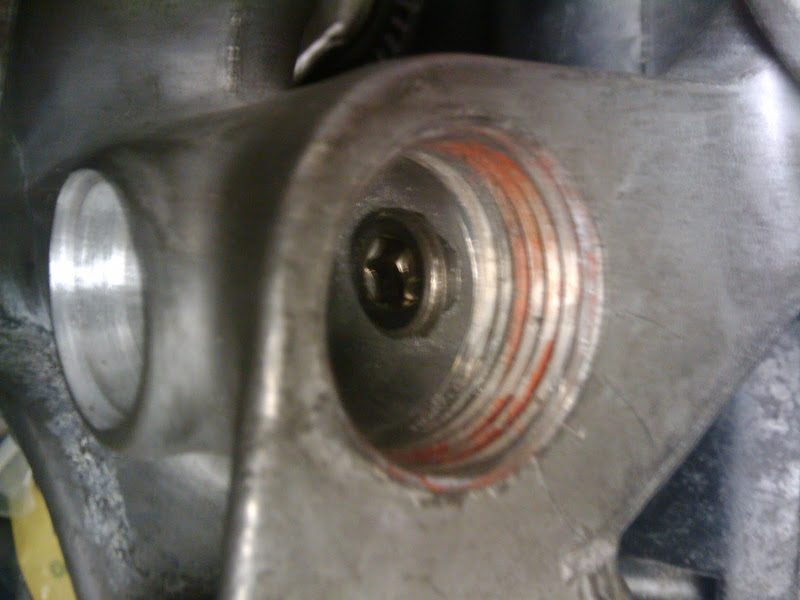
I was able to get the pipe though.
The two plus are 9/16 and 1/4". The passage through the tensioner assembly bottle necks a little bit in the center. I just opened it up from the outside to get the pipe though.
One thing I figured I would run into is a bypass for the core.. That 1/4" plug is in front of a 15/64" hole connecting the two heater lines. This will be plugged and I'll have to decide if I'm going to add an external bypass.
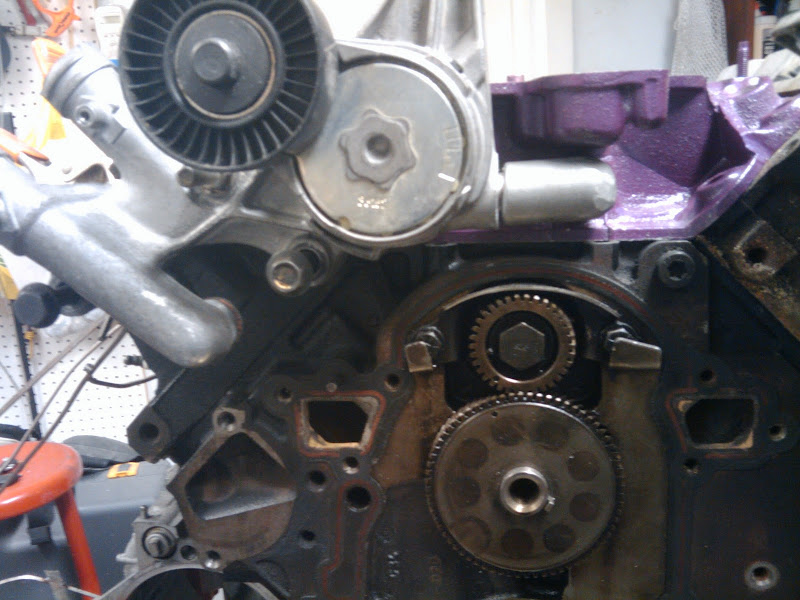
I grinded off the leg on the elbow and knocked down the boss for the bleeder. I also had to grind down the tensioner assembly so the new cast elbow doesn't hit it.
All that's really left now is plugging that bypass and deciding how I'm going to run the heater core inlet.
On to the pics:

Re: Goodbye nylon coolant elbow. :)
Posted: Thu Dec 24, 2009 9:45 pm
by 95naSTA
Finishing this up.. I heart McMaster.
I drilled out the bypass with a
7/16" bit, opened up the original 1/4" plug location, tapped the bypass with a
1/4"-18 NPT tap, and plugged it with a
1/4" plug. (you can use the original plug)

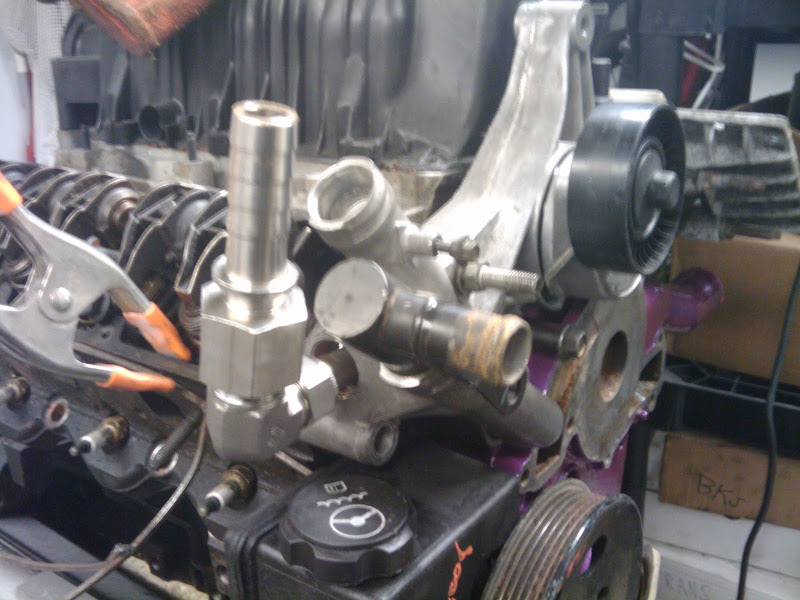
As far as the hose hook-up goes I took the somewhat expensive route..
I opted for a
stainless Yor-Lok 5/8" tube to 3/4" NPT fitting and
3/4" barb. Something was telling me that anything else would look bad next to all the polishing etc. I have going on. There are cheaper 5/8" tube adapter fittings and brass 3/4" barbs.
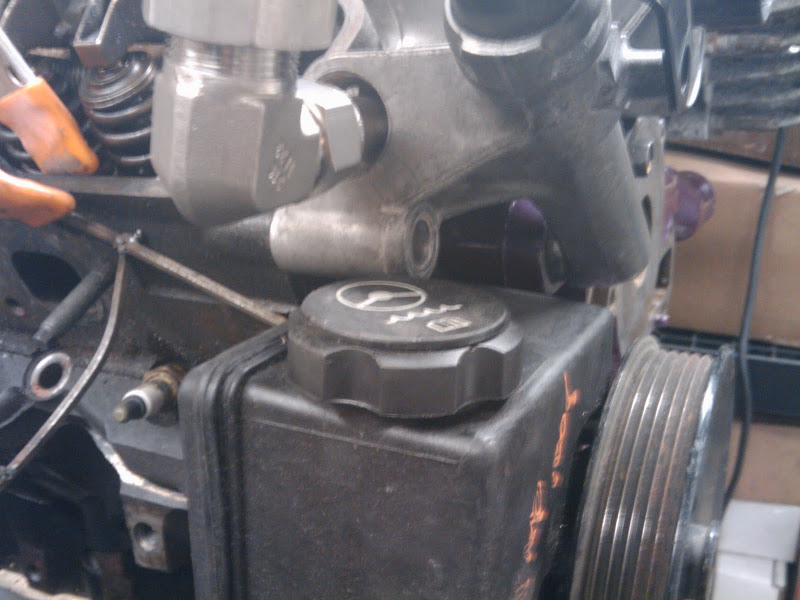
I also took a look in my engine bay to make sure I wasn't going to be hitting anything and found the power steering pump to be the closest thing. I mocked everything up with the p/s pump in place and there is no clearance issue.

And here's another use for that drill bit and tap:
The only thing left is finding a plug for the bleeder valve.
Actual testing isn't going to happen till my new engine and trans get dropped in. That might be toward the spring..
Edit-
The way I'll have to route the new hose was bothering me..
Finding a non-brass solution with a 90* bend was getting stupid expensive. ($80-100+ for 1 fitting)
I'm going to order 2 stainless 45* double female elbows and 2 double male unions. ($24) These fittings will arch the barb up, over, and parallel with the factory return fitting.
That empty tube coming up was bothering me too. So I'm going to chop it off and put a 3/8" plug in there.
I'm also going to tap the hole I opened up in the rear of the tensioner (the one for access to the bypass) and put a 3/8" plug in there. When tightened, it will hold the stainless coolant tube snug. The whole tube setup has some play and I don't want the heater hose making the setup move at the LIM.
And I'm adding a 1/16" NPT plug for the bleeder hole.