Page 2 of 4
Re: New Head Unit - How to Install Step-by-Step
Posted: Sun Feb 01, 2009 3:18 am
by grandprix104
http://www.crutchfield.com/cgi-bin/Prod ... 020D385USB
Looks like the 285 cannot control an ipod through the USB (this feature is a little buggy BUT I don't have an ipod. I have a Sansa)
The 285 has two pairs of preamp outs the 385 has 3 pair
The 285 is NOT satalite radio ready the 385 IS
The 385 has Changer Controls
The 285 doesn't come with a remote (the remote wont let you change between folders on a memery card or ipod - my one dislike)
PROS
I like the way this deck looks
It sounds good
Plays great off of a memory card
Lots of adjustment to the sound but they are slightly difficult to access
Bass boost actually sounds good (most decks that have this feature it sounds like a**)
CONS
The menus are a little unintuitive but ok once you figure them out
The buttons are pretty small and you dont feel them "push" sometimes
I now wish it had rear USB. You can then put the card in the glovebox or console instead of it sticking out the front of the deck.
Overall I like the deck cause it fits my style. It does not have some of the fancy bells and whistles some compareable models have, but it is very expandable. I can't wait to get bluetooth for it. I would definately go in and see it at an audio shop. Play with the controls and see how it feels. I will say I really don't have any regrets buying it.
Re: New Head Unit - How to Install Step-by-Step
Posted: Sun Feb 01, 2009 3:56 am
by bonnevillain
there are no authorized clarion dealers in the state apparently, some local audio places might carry them though.
do you know the model of the install kit? (the plastic thing with the cubby) lol
is our stereo a 1.5 din or double din?
Re: New Head Unit - How to Install Step-by-Step
Posted: Sun Feb 01, 2009 1:23 pm
by grandprix104
I don't recall the model# of the kit but if you look it up in the schoshe application guide it will say there.
Our stereo is double din. I like my kit because it has a piece that wraps around the deck and makes it look a little more custom, rather than using the trim ring that comes with the deck.
Re: New Head Unit - How to Install Step-by-Step
Posted: Sun Feb 01, 2009 2:16 pm
by bonnevillain
OK. here's my list
Head Unit:
http://www.crutchfield.com/S-fcJyII2Bq8 ... 85USB.html
Basic adapter (no chimes)
http://www.sonicelectronix.com/item_558 ... +GM07.html
Install Kit
http://www.beachaudio.com/Scosche/Gm1583b-p-30433.html
do i need this?? i've seen it mentioned in other threads, i guess it depends on the head unit.
http://cgi.ebay.com/ws/eBayISAPI.dll?Vi ... otohosting
hopefully some of this info can help someone else out.. compared to the install in my 97, this is a pain!
Re: New Head Unit - How to Install Step-by-Step
Posted: Sun Feb 01, 2009 3:03 pm
by grandprix104
I am at work so I can't check your links (filtered) but that looks right. If you buy the HU from crutchfield I would order off the phone and ask them about the harness (they give you a harness AND dash kit FREE - so does sonicelectronix). They may carry it but don't advertise it as compatible due to the chimes issue.
Compared to the install in my old grand prix this was definately a PITA but totally worth it.
EDIT:: I found a better deal on my head unit on SonicElectronix EBAY store. It was $25 less than on thier website. Check into that - they still give you the free dash kit and harness. That should make up most the difference in price if you're interested.
Re: New Head Unit - How to Install Step-by-Step
Posted: Thu Feb 05, 2009 7:01 pm
by bonnevillain
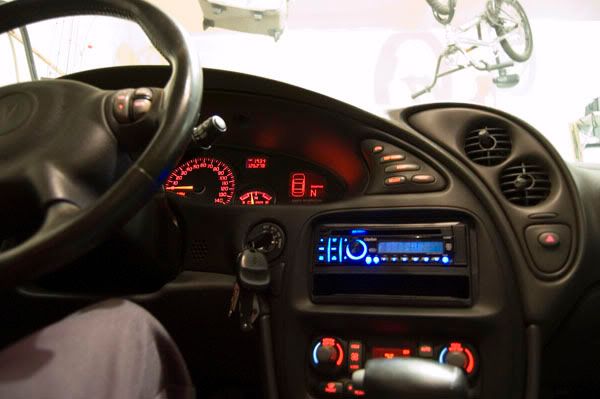
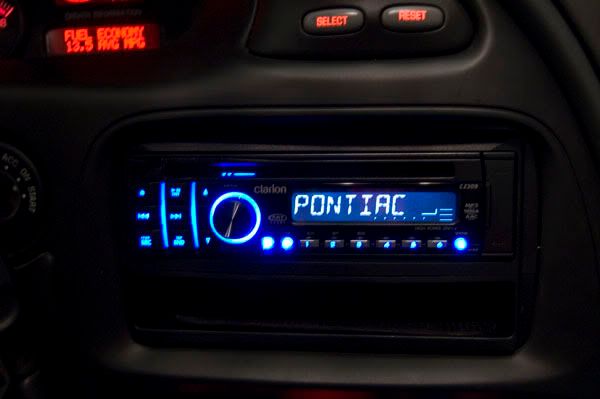
a quick update. the deck you ordered (and the one i ordered) is now discontinued. however, they "upgraded" me to this one for free, which appears to be the exact same, except with blue lighting. not the best for matching, but it will do.
http://www.sonicelectronix.com/item_171 ... CZ309.html#
got the free dash kit and harness.
do i also need an antenna adapter?
Re: New Head Unit - How to Install Step-by-Step
Posted: Fri Feb 06, 2009 2:10 am
by grandprix104
Yes you do. It is the same type adapter for some vws and other euro cars. That sucks about the backlighting. It was one of the main reasons I bought mine. Oh well.
Re: New Head Unit - How to Install Step-by-Step
Posted: Wed Feb 11, 2009 7:54 pm
by bonnevillain
how in the world did you get the wires to fit back there? i cut out a lot of plastic, but it jsut wont go

Re: New Head Unit - How to Install Step-by-Step
Posted: Wed Feb 11, 2009 10:13 pm
by grandprix104
It took a couple hours. I bent all the wires so they would sit neatly above (or in your case below) the head unit. I had to keep adjusting it to get and get the bulk of the wires to fall down through the space on the left side.
Re: New Head Unit - How to Install Step-by-Step
Posted: Wed Feb 11, 2009 10:14 pm
by bonnevillain
i just spent 5 hours trying to get this piece of crap in.. its just will not go. do you have any more install pictures, namely the plastic after you cut it?
Re: New Head Unit - How to Install Step-by-Step
Posted: Wed Feb 11, 2009 11:28 pm
by grandprix104
Two tips I can think of: Disconnect the antenna and ribbon connectors from the plastic in the back. Connect the new adapters and shove the whole harness upwards into the dash. You may want to tape them together first. Second, while sliding the deck backwards with one hand, reach your other hand up under the dash through the column and to that hole on the left of the cubby. Use that hand to pull the other wires back into the dashboard. This part was very frustrating. Unfortunately, I don't think I have any more pics, but I will look when I get home from work. Are you installing with the pocket on top or on the bottom?
Re: New Head Unit - How to Install Step-by-Step
Posted: Thu Feb 12, 2009 12:36 am
by bonnevillain
on the bottom. The ribbon connectors and antenna are disconnected. I tried pulling the wires through also. it seems like even the thickness of the wires going from the connector on the back of the HU out through the side hole is enough to stop it from going in all the way (the thickness of the wires because they have to go around the corner) if that makes sense.
I will give it another go tomorrow
Re: New Head Unit - How to Install Step-by-Step
Posted: Thu Feb 12, 2009 2:33 pm
by grandprix104
I would seriously consider cutting a channel out of the plastic all the way from the ribbon connector to the side hole. There is another 1/2 inch behind the plastic and the back of the new head unit will sit almost flush against the plastic in back. So any clearance for wiring has to be cut out of the back of the cubby. Good luck!
Re: New Head Unit - How to Install Step-by-Step
Posted: Mon Feb 16, 2009 2:45 pm
by grandprix104
So, did you ever get the thing in? Just wondering.
Re: New Head Unit - How to Install Step-by-Step
Posted: Mon Feb 16, 2009 7:37 pm
by bonnevillain
yeah, it was a PITA. i am never doing that again, LOL. i will get some pics of the new model up in a minute
the dash trim doesn't sit flush with the HU. it seems like there should be a clip around there to hold it in, but there isn't. it looks good if you press the dash trim in though

it's not centered perfectly either, but you can't really move it side to side
Re: New Head Unit - How to Install Step-by-Step
Posted: Sat Mar 07, 2009 9:48 pm
by alexcoqui
I know this has nothing to do with the post, but today I looked at this thread for the first time & noticed that you have a Taco Maker cup. I called my hole family, & we were laghing. Now let me explain, that we own some Taco Maker restaurant here in Puerto Rico. So you can guess it was kind of exiting to see that cup in the floor of your car so far away. Just wanted to let you know.
Re: New Head Unit - How to Install Step-by-Step
Posted: Fri May 29, 2009 3:08 pm
by SAMzGXP
i think this thread should be a sticky
Re: New Head Unit - How to Install Step-by-Step
Posted: Sat Jun 06, 2009 3:07 pm
by do9105
Should I do anything differently (or not do something) if I don't have an amp. Although I do plan on getting one.
Re: New Head Unit - How to Install Step-by-Step
Posted: Sun Jun 07, 2009 12:48 am
by grandprix104
if you dont have the amp then you will need to make sure you connect all the speaker wires from your HU harness and the CDI harness together. I didnt because with the amp I had all aftermarket wiring. Also without doing the amp, it is not necessary to run the power and remote lines to the battery/trunk. Just match them up as you would do with the speaker wires on both harnesses. That way is simpler and doing the wiring to the battery is just overkill at this point for you. When you get the CDI it will have instructions and diagrams of how to wire it up. Since you will be doing a basic install just go ahead and follow those instructions. If you have any more questions feel free to ask. (I will be out of town 'til wednesday though)
Re: New Head Unit - How to Install Step-by-Step
Posted: Thu Jun 11, 2009 11:42 am
by do9105
I got mine installed :D

I didn't even have to cut anything behind it. The headunit I bought was the pioneer DEH-P400UB if anybody is wondering. Quality heaunit, I definitely noticed an increase in sound quality. Couldn't be more happy.
For anyone that is looking to install an aftermarket headunit in there bonneville and is wondering what to buy, heres everything I bought:
Metra 99-3301 Cadillac/Buick/Chevy 1995-up Dash Kit
Pioneer DEH-P400UB
C2R-GM32R
'03 SE
I will post pics soon

Oh yeah and this was my first time installing a headunit... I taped my ground leads to the bare metal... haha - whatever works
