Page 2 of 4
Re: My 96 SSEi project (lots of pics)
Posted: Sun Mar 16, 2014 11:30 am
by 2000Silverbullet
Pftt.....pulls right off......surprised they don't just fall off by themselves if not for those two screws.
Re: My 96 SSEi project (lots of pics)
Posted: Sun Mar 16, 2014 2:54 pm
by zuper8
well, the cladding was hardly my main concern once I got into it... I had a hell of a time lining up that fender. I have done several Bonneville fenders and none of them were this tricky. The fender I got was cheap because someone had already tried to take it off but didn't know what they were doing, and all the brackets were bent and twisted slightly. Secondly, it was rotted out on the bottom so I couldn't attach the two bolts at the rocker panel. Anyone who has looked for a 96-99 fender in the past few years knows that every single one is rotted there. Thirdly, since the car got hit in the front corner the bumper cover was smushed up there and making the corner light not fit right. therefore, alignment was a b-otch

But it looks decent now! the perfectionist in me can't stand certain aspects of it, but certainly a cheap improvement over the original. Next weekend I will sand the bumper where the paint rubbed off and use a rattle can to make that look a little better til I can get another bumper. Then I will wash, do a quick wax, and get some pics

Re: My 96 SSEi project (lots of pics)
Posted: Sun Mar 23, 2014 6:34 pm
by zuper8
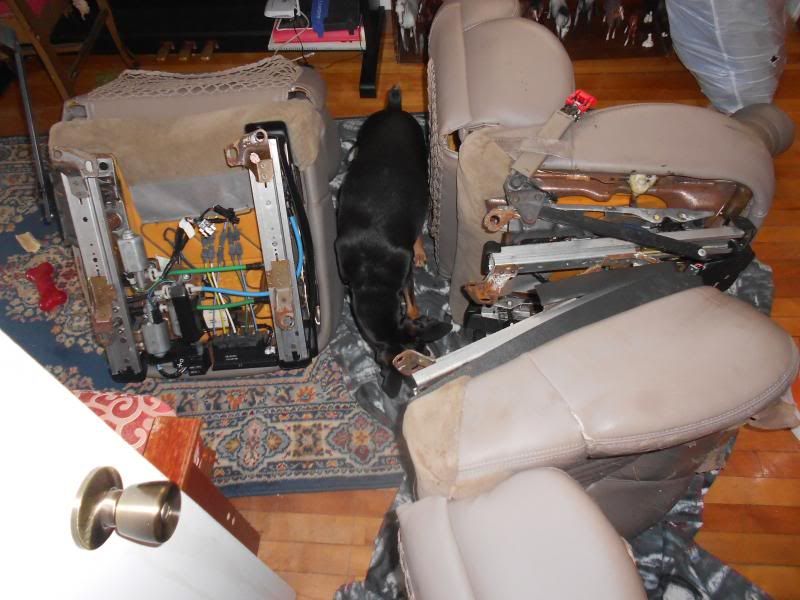
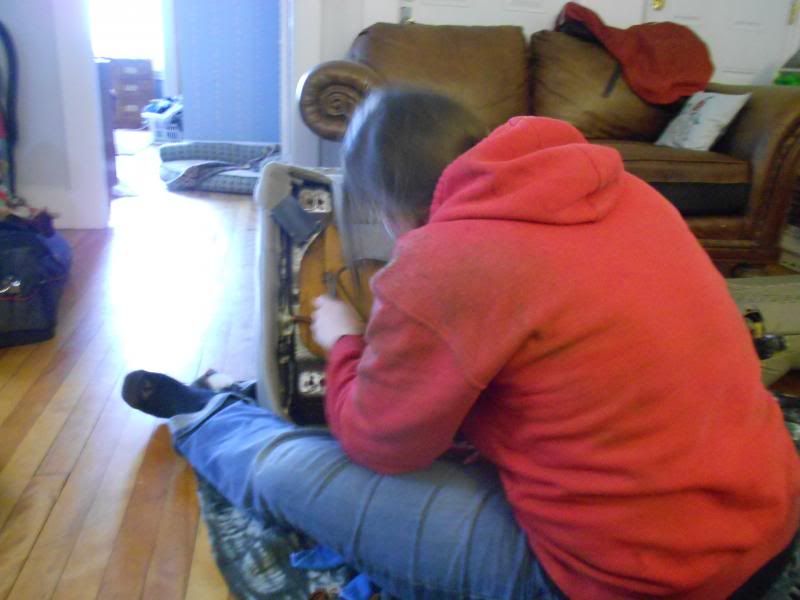
I fixed up the interior this weekend!

So you know how when you have AL7s, and you go to the junkyard and find a car with you leather color, at first you're excited. Then you see that the only nice seat is the passenger seat, which you don't need. This was one of those times. I found a car with my color interior and AL7s! But, the driver's side outside bolster was completely wrecked. Passenger side was in very nice shape.
So what do I do? I buy both seats. The new passenger side one is better than the one that's in the car, so that was a complete swap. As for the driver's seat, I had a theory that while the tracks and bottom seat cover are side specific, the seatbacks are not. So folks who have torn driver's side AL7s and have been searching for a cover to no avail, keep reading! I managed to remove the seatback from the passenger side seat that was in the car when I bought it, and swap it onto the bottom cushion and tracks that I got from the JY. And all the buttons/ functions of the seat work! It is a bit time consuming, but worth it if you are like me and have an old car whose PO did not take care of the leather.
Took over the spare room for a weekend...
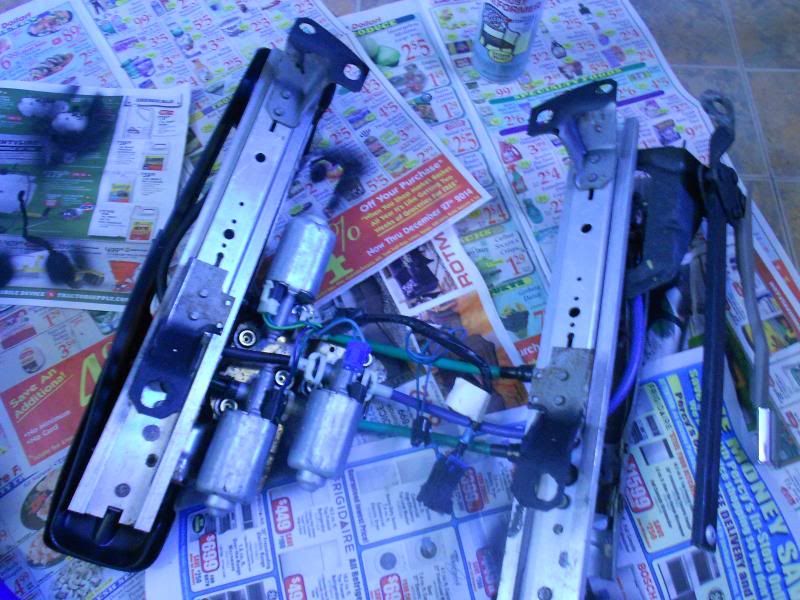
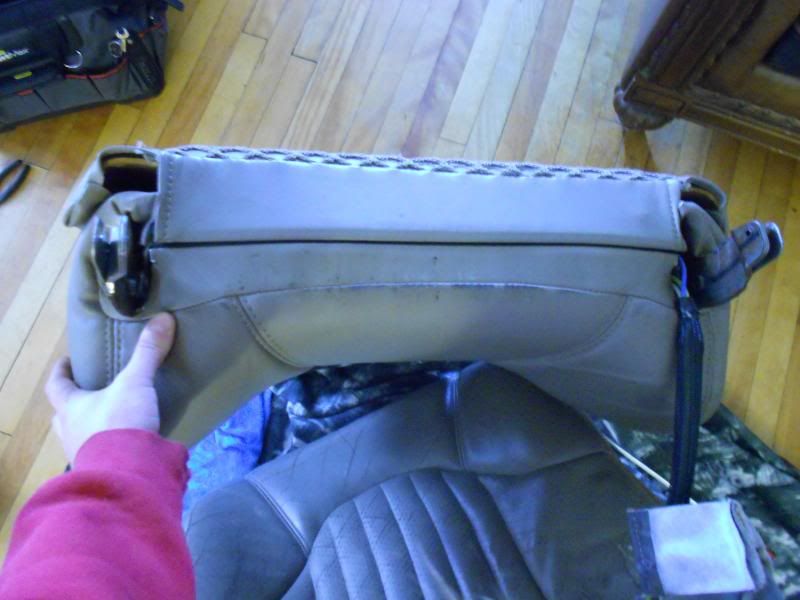
Tracks off. The tracks had to be swapped with the originals on both because the 96 seatbelts are different!
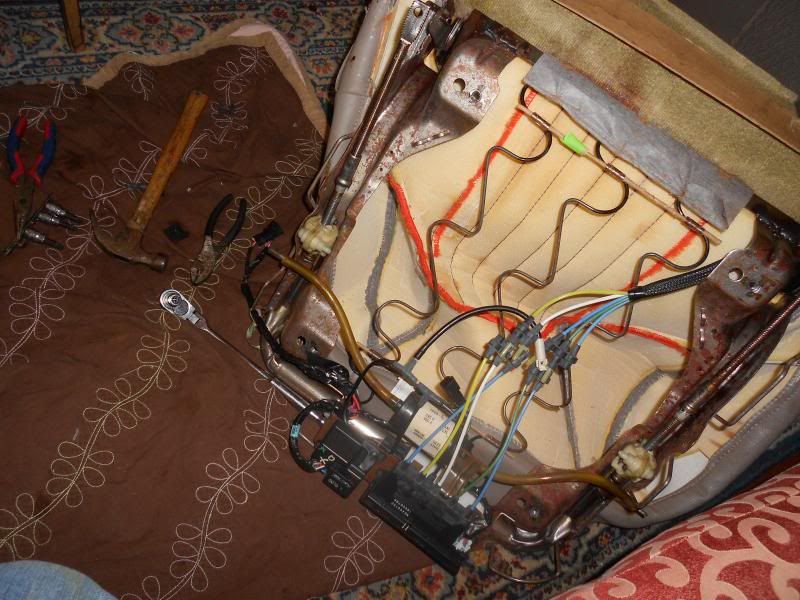
Parts removed from the original passenger seat. The cover has to be peeled back to get the seatback out. FSM calls for the cushion to be completely removed, but the second time around I just removed the hog rings on the cover and smushed the cushion out of the way.
The feet for all the tracks were rusted, so I painted them with this Rustoleum "rust reformer" paint before re-installing. I dunno, couldn't hurt.
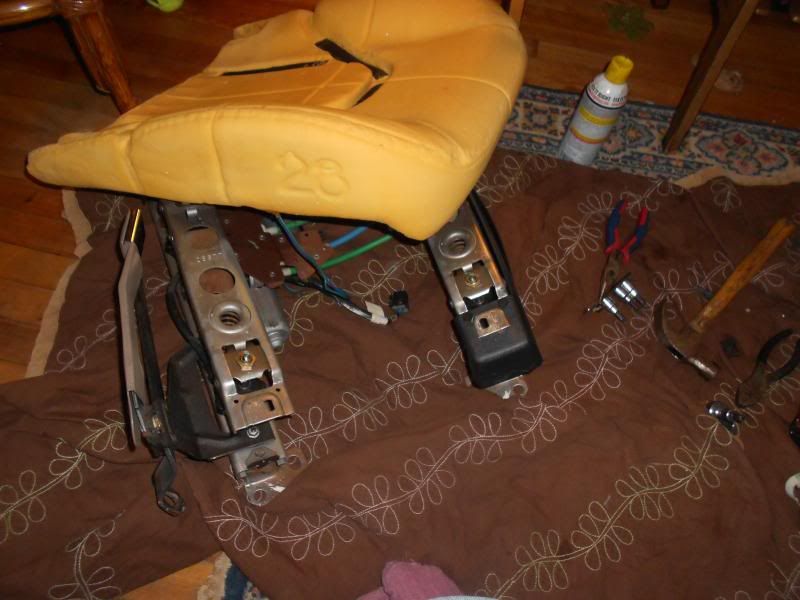
Me all haggard on the floor fussing with the hog rings
ahhaaa! got it out and putting it on the new bottom cushion!
Re: My 96 SSEi project (lots of pics)
Posted: Sun Mar 23, 2014 6:38 pm
by zuper8
Re: My 96 SSEi project (lots of pics) Interior finished!
Posted: Sun Mar 23, 2014 11:08 pm
by nos4blood70
Wow! What a night and day difference.
Re: My 96 SSEi project (lots of pics) Interior finished!
Posted: Mon Mar 24, 2014 6:17 am
by 1oldman
Dang! Interior looks great! - BC
Re: My 96 SSEi project (lots of pics) Interior finished!
Posted: Mon Mar 24, 2014 8:49 am
by Jrs3800
Looking really good Rachael !!
Re: My 96 SSEi project (lots of pics) Interior finished!
Posted: Mon Mar 24, 2014 9:05 am
by SSEiMan01
Wow! I need to do mine now.
Re: My 96 SSEi project (lots of pics) Interior finished!
Posted: Mon Mar 24, 2014 10:56 am
by 2000Silverbullet
Nice improvement. Bless those organ donor Bonne's.
Re: My 96 SSEi project (lots of pics) Interior finished!
Posted: Mon Mar 24, 2014 12:54 pm
by BonnieBoy08
Beautiful!
Re: My 96 SSEi project (lots of pics) Interior finished!
Posted: Mon Mar 24, 2014 7:59 pm
by myfirstbonnie
Very nice!
Re: My 96 SSEi project (lots of pics) Interior finished!
Posted: Mon Mar 24, 2014 8:28 pm
by nconti13
Wow! Really cool to see the amount of work you have gotten done on it in such a short time. It's looking great! Did you use the same spray you used on the floor mats to get the stains out of the carpets? When the weather gets nice (hopefully soon, never know with this crazy New England weather....), I would like to clean up my carpets a bit.
Re: My 96 SSEi project (lots of pics) Interior finished!
Posted: Wed Mar 26, 2014 9:53 pm
by zuper8
thank you all! It was fun taking all these rough parts and making them work. The donor car had been sitting in that junkyard since 2012!! it was not in good shape any more.
Re: My 96 SSEi project (lots of pics) Interior finished!
Posted: Wed Apr 23, 2014 5:44 pm
by zuper8
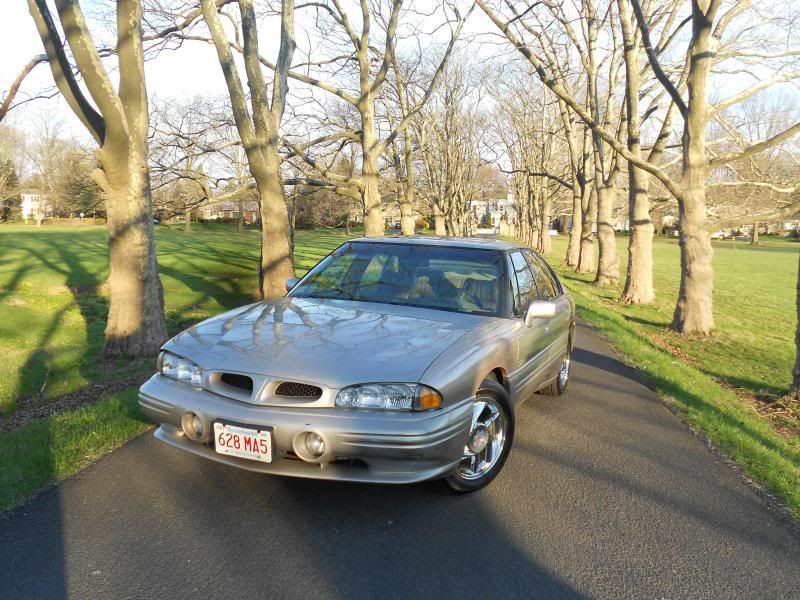
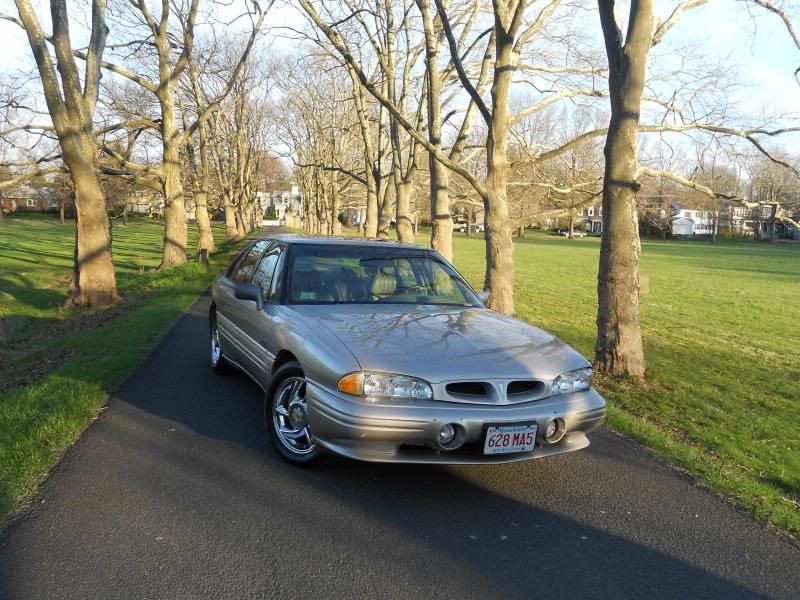
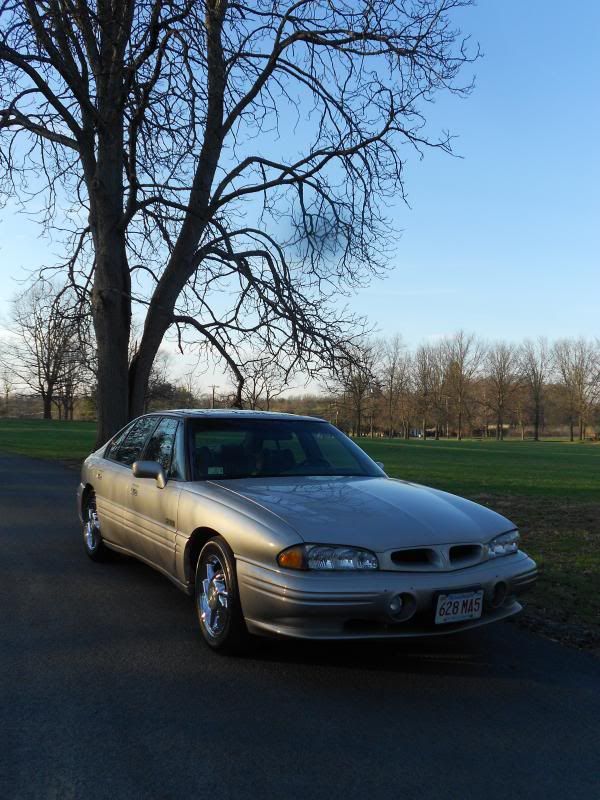
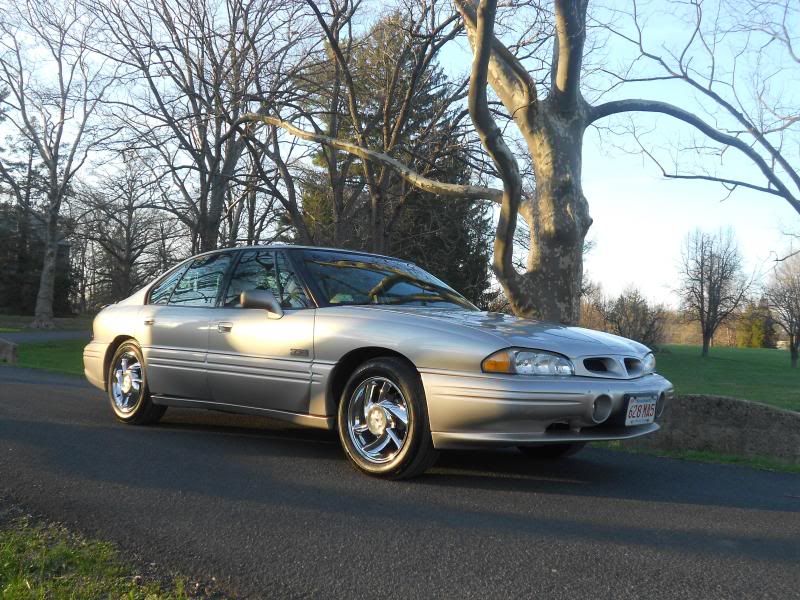
I had the opportunity to detail the car this past weekend. I was visiting my parents, and they have a garage. After claying the car, I could finally see just how damaged the clear coat was. The fine scratches were very deep and my buffer/ pads couldn't get them out completely. The main problem was that I only had one yellow cutting pad. Once that was clogged I had to switch to orange, and that just wasn't strong enough. Still, the car looks much nicer than it did before, and quite respectable for a $700 car. I also did a much-needed coolant flush.
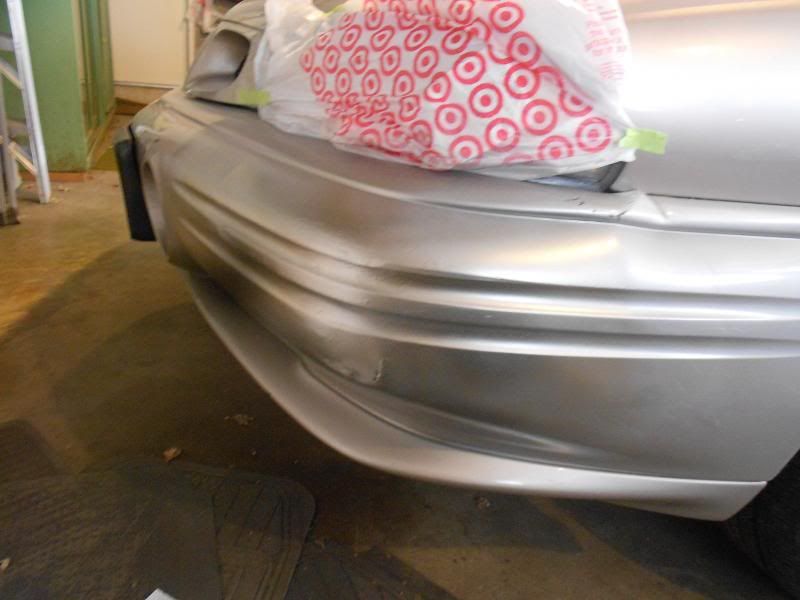
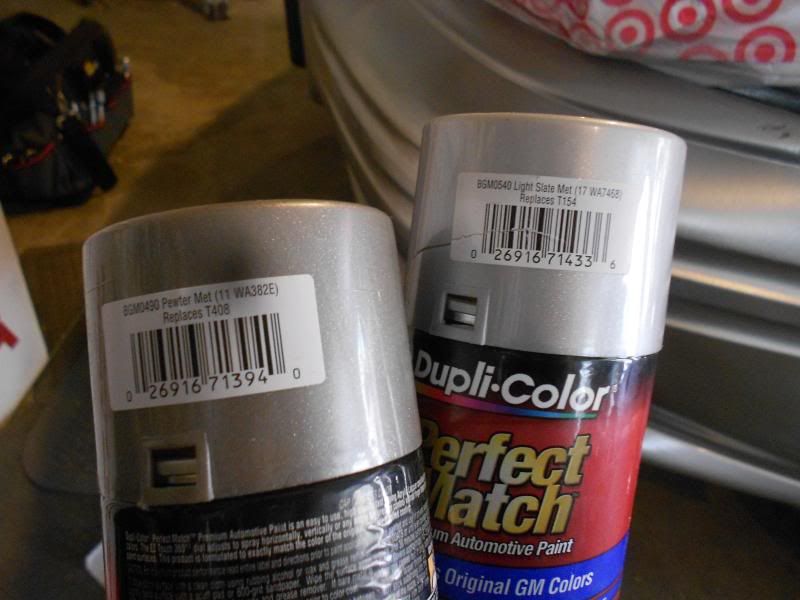
While I was polishing, I attempted to touch up the bumper. The color is Stone Beige Metallic, and none of the parts stores sell it. So I combined two other GM colors and got a result that is good enough, especially from a distance.
My hasty prep work. I got a little overspray on the corner light but the rest was pretty contained

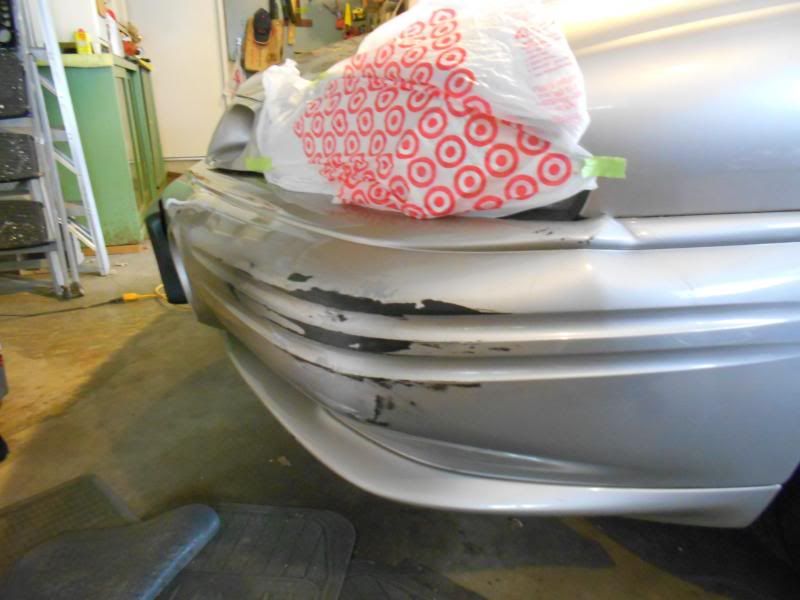
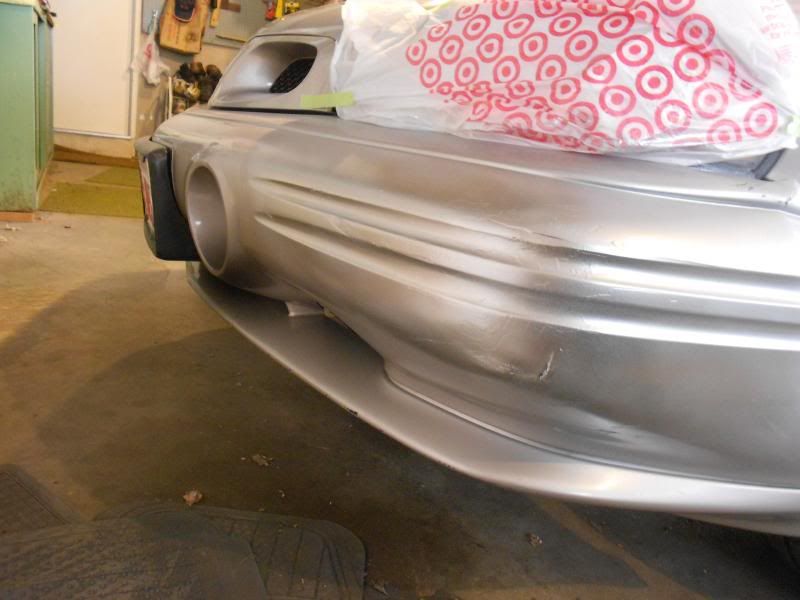
Primer
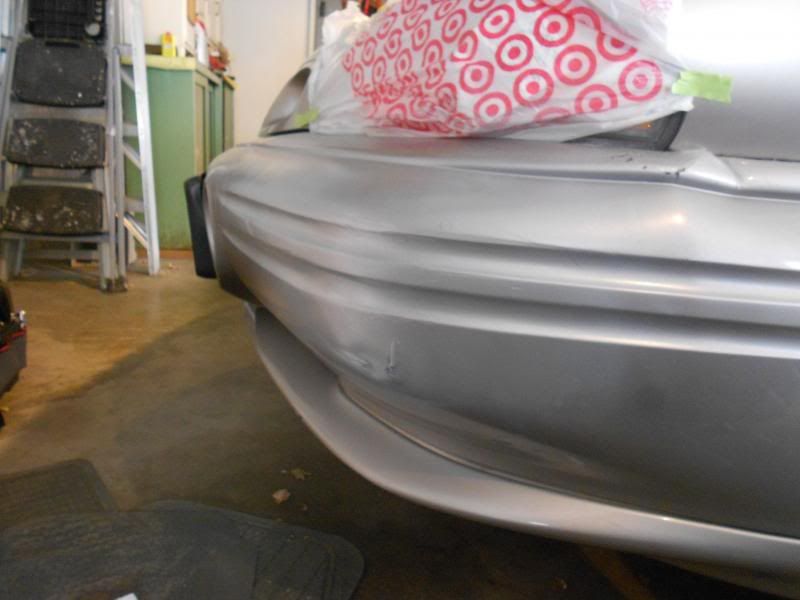
Silver
And a dusting of Pewter because the silver is too bright by itself
If you have a stone beige metallic car and are feeling cheap like I was, here's what I used.
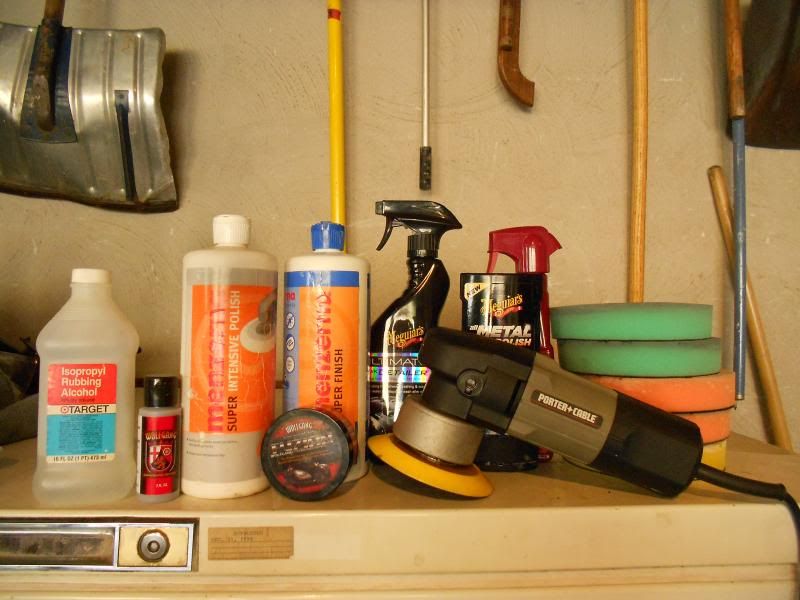
Spent a good long time with Menzerna Super Intensive Polish.

Products I used, not pictured is the Meguiar's clay bar and a whole lot of microfiber towels.
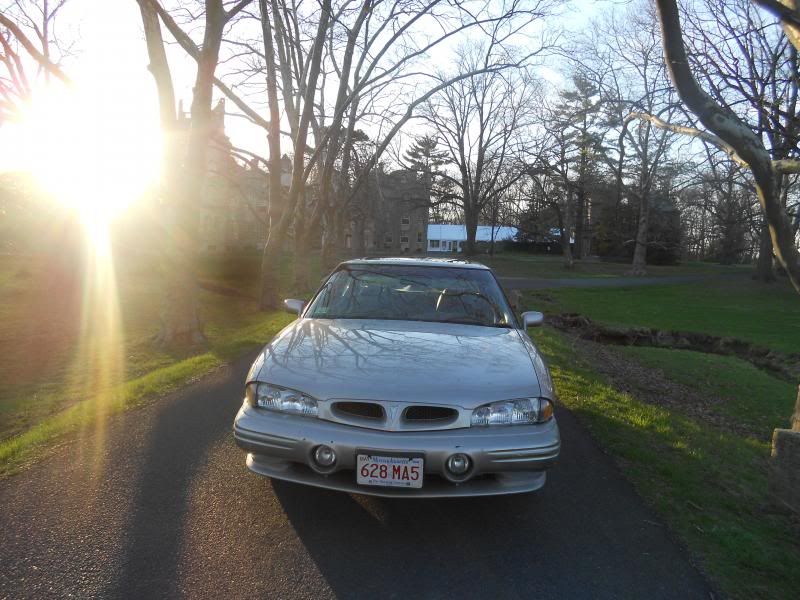
Finished. After having a dark color Bonneville, this color is not exactly a detailer's delight. But it looks well cared-for now at least. How do you get silver to pop anyway??
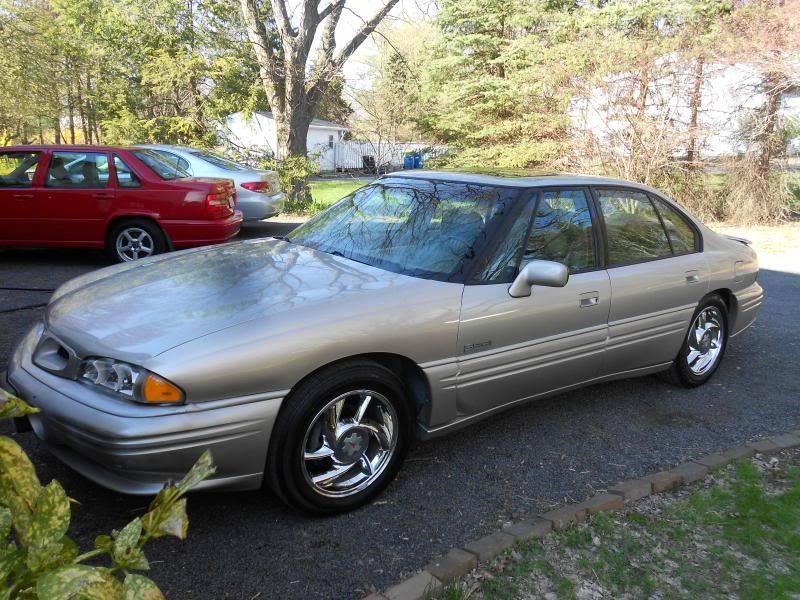
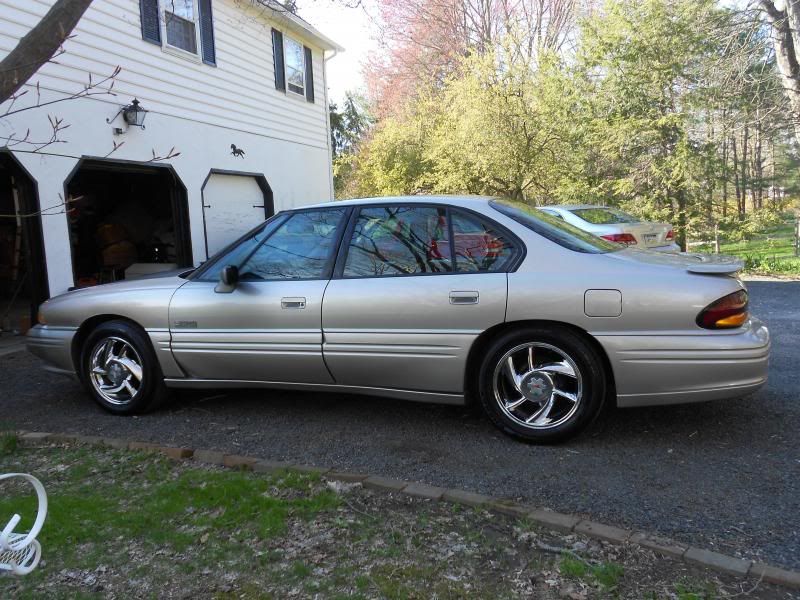
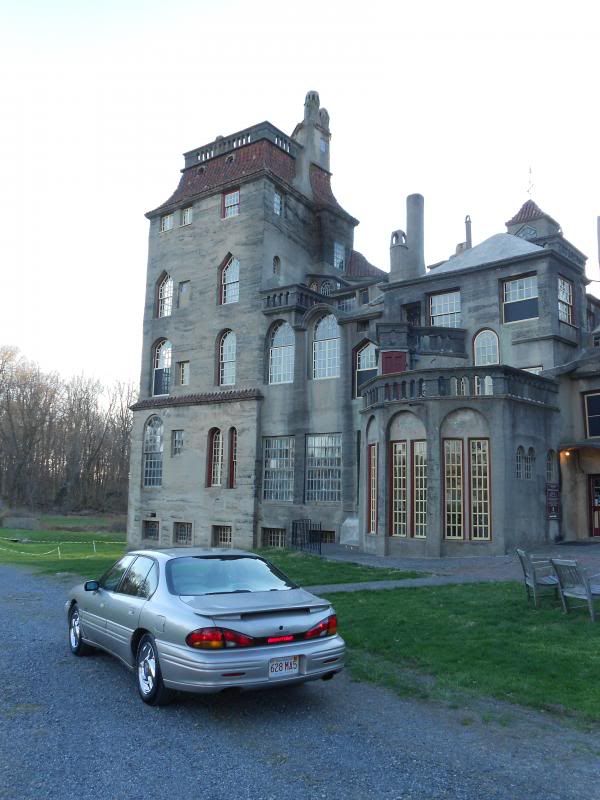
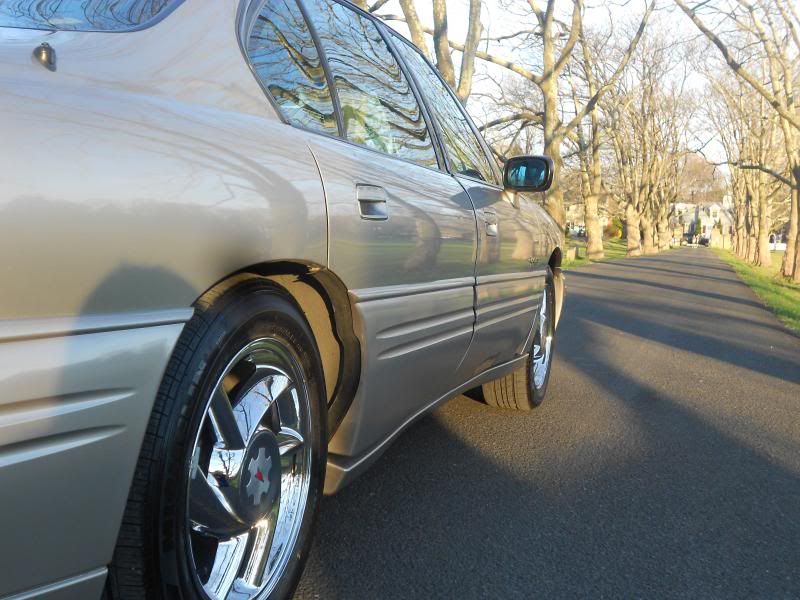
I took the car to Fonthill Castle in Doylestown, PA for a little photo shoot. Here you can see the fender I put on and the bumper touch-up. The fender is slightly off, but most people say they don't notice until I point it out.
Now my list reads:
LIM gaskets
SC coupler
Trans cooler lines/ trans service
Patch nylon fuel line (PO repaired it but wasn't as good at it as I am haha. Seeps a little at the union.)
Airmix actuator
Clear corners
Chrome exhaust tips
Then I'll be happy
Re: My 96 SSEi project (lots of pics) Update bottom of pg. 2
Posted: Wed Apr 23, 2014 6:30 pm
by PRD2BDF
Looks great! I know what you mean about silver. My Bonneville never really popped. But Stewie, now he popped. Peter doesn't pop even though its dark blue. I've tried
Re: My 96 SSEi project (lots of pics) Update bottom of pg. 2
Posted: Wed Apr 23, 2014 6:31 pm
by zuper8
Thanks! Yeah, some paints are just nothing special. You'd think with all the metal flake in SBM it would be more dazzling... it does look better in person though. My snapshot digital camera has seen better days lol.
Re: My 96 SSEi project (lots of pics) Update bottom of pg. 2
Posted: Wed Apr 23, 2014 7:00 pm
by DJC906
Nice car, looks so good with those wheels. You did a great job bringing it back to life
Re: My 96 SSEi project (lots of pics) Update bottom of pg. 2
Posted: Wed Apr 23, 2014 7:38 pm
by Evan0801
WOW. You can sure make a car look good! What kind of Michelin tires are those? Looking for new tires to put on my swoopies.
Re: My 96 SSEi project (lots of pics) Update bottom of pg. 2
Posted: Wed Apr 23, 2014 8:20 pm
by 2000Silverbullet
You have given me new respect for female gear heads.
Re: My 96 SSEi project (lots of pics) Update bottom of pg. 2
Posted: Wed Apr 23, 2014 8:28 pm
by nos4blood70
I too wonder how you can make silver pop.
Also, swoopies look better on that generation than they do on the 2000+. Your car is amazing.


