

2003 BMW M5
-
95naSTA

- Certified Bonneville Nut

- Posts: 7089
- Joined: Wed May 21, 2008 11:47 pm
- Year and Trim: 95 SLE
- Location: Philadelphia
- Contact:
Re: 2003 BMW M5
I had a buddy learn that lesson for me. It dented up his roof pretty good. Because of him, I think about that A LOT.
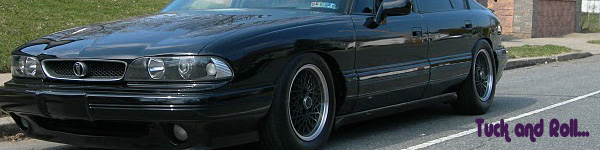
95 SLE... a keeper. 241k miles. Low and Slow.
97 BMW 528i
98 Infiniti vq35'd i30: 13.3@104mph, 30MPG Hwy (RIP)
02 Jag X-type
03 BMW M5
05 Chevy Cobalt LS
07 Infiniti G35s 6MT (Sold)
07 Ducati Monster S2R 800 with DS1000 swap
83 Yamaha IT175K
72 Yamaha DS7: '74 RD250 swap, JL chambers
Info on dropping a 92-99: Here.
-
95naSTA
- Certified Bonneville Nut
- Posts: 7089
- Joined: Wed May 21, 2008 11:47 pm
- Year and Trim: 95 SLE
- Location: Philadelphia
- Contact:
Re: 2003 BMW M5
Back in November my clutch started to slip at WOT high RPM shifts. This was unexpected since the PO changed the clutch 10k before I got the car, about 40k miles ago.. I decided to drive the car around, mostly locally, until it got worse but it never did. In April, I booked an Outer Banks trip with my family for the end of June. I did not want to load up the car then drive the 1k miles round trip on a clutch that wasn’t 100%. I also had a growing list of while your in there’s to go with a clutch and flywheel and wanted to tackle it all at the same time. The trans case sealant had been leaking since I got the car and there’s no sense in doing that job without replacing the trans seals as well. The rear main seal was on the list with the coolant crossover gasket, oil control valve + o-ring, I bought the coolant cap o-rings for the back of the heads but didn’t bother since they weren’t even seeping, shift rod joint, OEM pivot pin, shift fork, guide rod, OEM pilot bearing, and maybe some other small things.
I tried scheduling some lift time at a buddy’s shop for June but by the end of May that wasn’t looking likely. That meant I was going to do the job in my tetris game of a city garage on truck jack stands. I wasn’t sure what kind of issues I would run into and I wanted to allot for time to drive the car before I sent it on a road trip. I try to stick to the ‘if I’m going to take anyone’s time, it’s going to be my time’ mindset, limiting time away from my kids. I probably worked about 30-40 hours across a couple half work days during the week, one full PTO day and some nights to knock this all out. I started Friday the 29th of May and test drove it the 11th of June.
Starting off with the leaky trans.

The Medusa headers made things tight and I actually had to remove the primary to primary brackets and sneak the bellhousing down (and eventually back up) through that space.


Pilot bearing bolt method.


Re-sealing the trans was a little nerve-racking due to how far you have to take it down. I’ve had a few FWD transmissions apart for repair/rebuild but new stuff always opens up new ways to screw something up. Thankfully this video was able to provide me with the knowledge and confidence to tackle the reseal job. https://www.youtube.com/watch?v=ueI6AaQFhPU
For a work table I used a folding Huskey shop cart with a wooden ramp. For re-assembly of the tail section, I used a 5 gal bucket and some scrap steel. I did lose an hour because one of the shift rod pins dropped (warned in the YT vid). Hindsight being 20/20, I would tilt the case next time so those pins are parallel to the ground. I also tested the shift pattern out of the car and it went through the gears without issue.

5 gal bucket stand.

Here are the shift rod pins mentioned in the paragraph above greased into place for reassembly.

Tail section.


Bellhousing.


Here’s, what I believe to be the reason for the terrible clutch life. It looks like the PO’s Indy used an 80 grit sanding disc to resurface the original flywheel.. After 40k, the sanding swirls are still deep.

Originally I was going to go with a brass pivot pin but when I saw the condition of the one with 40k on it in the car, I went back to OEM..

Although the output seal came with a new nut, I felt safer reusing the original and carefully torquing it to the exact marking I made with a Dremel.

Checking the shift pattern.

Buttoned up.

It took me about 3 hours to get the trans from the floor bolted to the engine. For whatever reason, the input shaft did not want to slide into the pilot bearing. I took it back down after an hour and a half of trying to shake it in (after I felt the input shaft splines slide into the friction disc). The clutch alignment tool slid in no problem. I used the alignment tool to add some lube the lip of the pilot bearing and the Friston disc splines, put the trans back up, hoping it would help but it didn’t really. After I got the trans slid up to the pilot bearing again, it wouldn’t go. I shook it as violently as I could on my back for about 5 mins and it moved enough for me to have a medium confidence level when threading bolts in. This is far from my first clutch job and have had similar issues in the past but this one was certainly special.
I was able to put about 200 trouble free miles on the car after this job before the Outer Banks road trip. The car performed great on the trip and I’ve added another 1100 miles or so. No leaks so far either.
Here’s a shot of a monster truck we rode at Grave Digger’s Dungeon near the entrance to OBX.

Hotel shot, we lucked out big time on the weather.

Fast food pitstops to/from.


It felt great to knock all that work out on somewhat of a time crunch and not have any hiccups.
I tried scheduling some lift time at a buddy’s shop for June but by the end of May that wasn’t looking likely. That meant I was going to do the job in my tetris game of a city garage on truck jack stands. I wasn’t sure what kind of issues I would run into and I wanted to allot for time to drive the car before I sent it on a road trip. I try to stick to the ‘if I’m going to take anyone’s time, it’s going to be my time’ mindset, limiting time away from my kids. I probably worked about 30-40 hours across a couple half work days during the week, one full PTO day and some nights to knock this all out. I started Friday the 29th of May and test drove it the 11th of June.
Starting off with the leaky trans.
The Medusa headers made things tight and I actually had to remove the primary to primary brackets and sneak the bellhousing down (and eventually back up) through that space.
Pilot bearing bolt method.
Re-sealing the trans was a little nerve-racking due to how far you have to take it down. I’ve had a few FWD transmissions apart for repair/rebuild but new stuff always opens up new ways to screw something up. Thankfully this video was able to provide me with the knowledge and confidence to tackle the reseal job. https://www.youtube.com/watch?v=ueI6AaQFhPU
For a work table I used a folding Huskey shop cart with a wooden ramp. For re-assembly of the tail section, I used a 5 gal bucket and some scrap steel. I did lose an hour because one of the shift rod pins dropped (warned in the YT vid). Hindsight being 20/20, I would tilt the case next time so those pins are parallel to the ground. I also tested the shift pattern out of the car and it went through the gears without issue.
5 gal bucket stand.
Here are the shift rod pins mentioned in the paragraph above greased into place for reassembly.
Tail section.
Bellhousing.
Here’s, what I believe to be the reason for the terrible clutch life. It looks like the PO’s Indy used an 80 grit sanding disc to resurface the original flywheel.. After 40k, the sanding swirls are still deep.
Originally I was going to go with a brass pivot pin but when I saw the condition of the one with 40k on it in the car, I went back to OEM..
Although the output seal came with a new nut, I felt safer reusing the original and carefully torquing it to the exact marking I made with a Dremel.
Checking the shift pattern.
Buttoned up.
It took me about 3 hours to get the trans from the floor bolted to the engine. For whatever reason, the input shaft did not want to slide into the pilot bearing. I took it back down after an hour and a half of trying to shake it in (after I felt the input shaft splines slide into the friction disc). The clutch alignment tool slid in no problem. I used the alignment tool to add some lube the lip of the pilot bearing and the Friston disc splines, put the trans back up, hoping it would help but it didn’t really. After I got the trans slid up to the pilot bearing again, it wouldn’t go. I shook it as violently as I could on my back for about 5 mins and it moved enough for me to have a medium confidence level when threading bolts in. This is far from my first clutch job and have had similar issues in the past but this one was certainly special.
I was able to put about 200 trouble free miles on the car after this job before the Outer Banks road trip. The car performed great on the trip and I’ve added another 1100 miles or so. No leaks so far either.
Here’s a shot of a monster truck we rode at Grave Digger’s Dungeon near the entrance to OBX.
Hotel shot, we lucked out big time on the weather.
Fast food pitstops to/from.
It felt great to knock all that work out on somewhat of a time crunch and not have any hiccups.
95 SLE... a keeper. 241k miles. Low and Slow.
97 BMW 528i
98 Infiniti vq35'd i30: 13.3@104mph, 30MPG Hwy (RIP)
02 Jag X-type
03 BMW M5
05 Chevy Cobalt LS
07 Infiniti G35s 6MT (Sold)
07 Ducati Monster S2R 800 with DS1000 swap
83 Yamaha IT175K
72 Yamaha DS7: '74 RD250 swap, JL chambers
Info on dropping a 92-99: Here.
-
Sirius

- Resident Gearhead

- Posts: 2147
- Joined: Thu May 22, 2008 10:40 am
- Year and Trim: 2003 SSEi
- Location: West Point
Re: 2003 BMW M5

Resident Tightwadgweg_b wrote:People think I'm nuts, but Matt proved it.

Screw you, Photobucket.