

New Head Unit - How to Install Step-by-Step
-
grandprix104

- Posts like an LN3

- Posts: 476
- Joined: Thu May 22, 2008 1:02 am
- Year and Trim: 2001 SE L36
- Location: Roy, Utah
- Contact:
Re: New Head Unit - How to Install Step-by-Step
cool! Thats great you didnt have to cut anything.
2001 Pontiac Bonneville SE 3.8n/a 110k, PLIM, APN UIM, 180 T-stat, Clarion DXZ385USB, Memphis 6.5s/6x9s/12" PR sub, Kicker ZX700.5 Amp.
1999 Jeep Grand Cherokee Limited 4.7 V8 120k, WAAG Brush Guard, 2in Lift, SkyJacker Shocks, HD front driveshaft, Infinity Tweeters, 12" Memphis sub, Rockford Fosgate Punch amp
1994 Pontiac Grand Prix 3100 180k SOLD :(

1999 Jeep Grand Cherokee Limited 4.7 V8 120k, WAAG Brush Guard, 2in Lift, SkyJacker Shocks, HD front driveshaft, Infinity Tweeters, 12" Memphis sub, Rockford Fosgate Punch amp
1994 Pontiac Grand Prix 3100 180k SOLD :(
-
mntnbkr

- GXP Member

- Posts: 229
- Joined: Sun Mar 22, 2009 1:46 pm
- Year and Trim: '99 SSEi
- Location: Fenton, MI
Re: New Head Unit - How to Install Step-by-Step
WAIT A MINUTE!!! you TAPED your ground wires!?!?  That's ridiculous, and it won't last long. When you start blowing fuses, or start a fire under your dash, you'll know exactly where to look for the problem. A self-tapping sheet metal screw can't cost more than 3 cents at the hardware store...you should buy one, and USE IT.
~Adam
'99 SSEi
'02 Volvo S60 AWD 2.4T
'02 Jeep Liberty Sport
'89 Chaparral 187XL w/ 4.3L I/O Mercruiser
'00 Cannondale Jekyll 900SX
Follow me on twitter: adumb
'99 SSEi
'02 Volvo S60 AWD 2.4T
'02 Jeep Liberty Sport
'89 Chaparral 187XL w/ 4.3L I/O Mercruiser
'00 Cannondale Jekyll 900SX
Follow me on twitter: adumb

Re: New Head Unit - How to Install Step-by-Step
haha yup i used duck tape... I know I shouldve' probably just used a self tapping screw to begin with but I don't have one... Thanks for letting me know how urgent it is to use one though! haha. I had no idea it could turn out like that. The headunit turns off everyone once in a while anyways because the ground wires get a little loose. and then i gotta take the whole thing out and retape the wires then put the headunit back in - kinda annoying... anyways i'm off to the store to get a some self tapping screws
oh yeah and is it ok to have the ground wires touching? at the moment they aren't
Pictures:
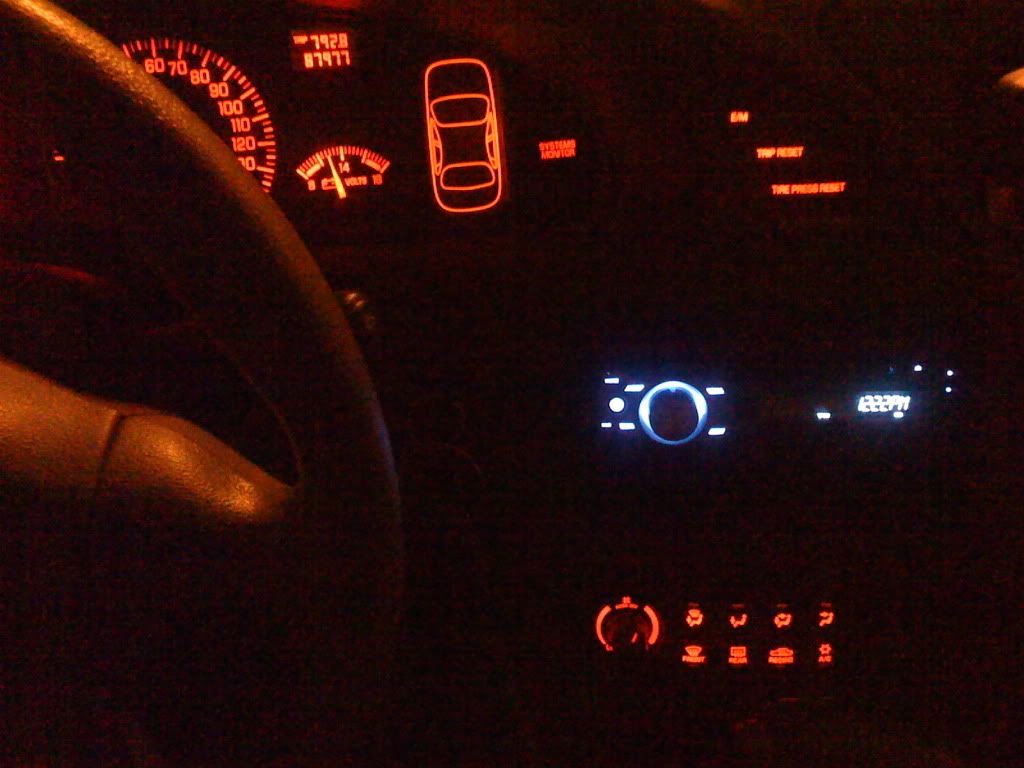
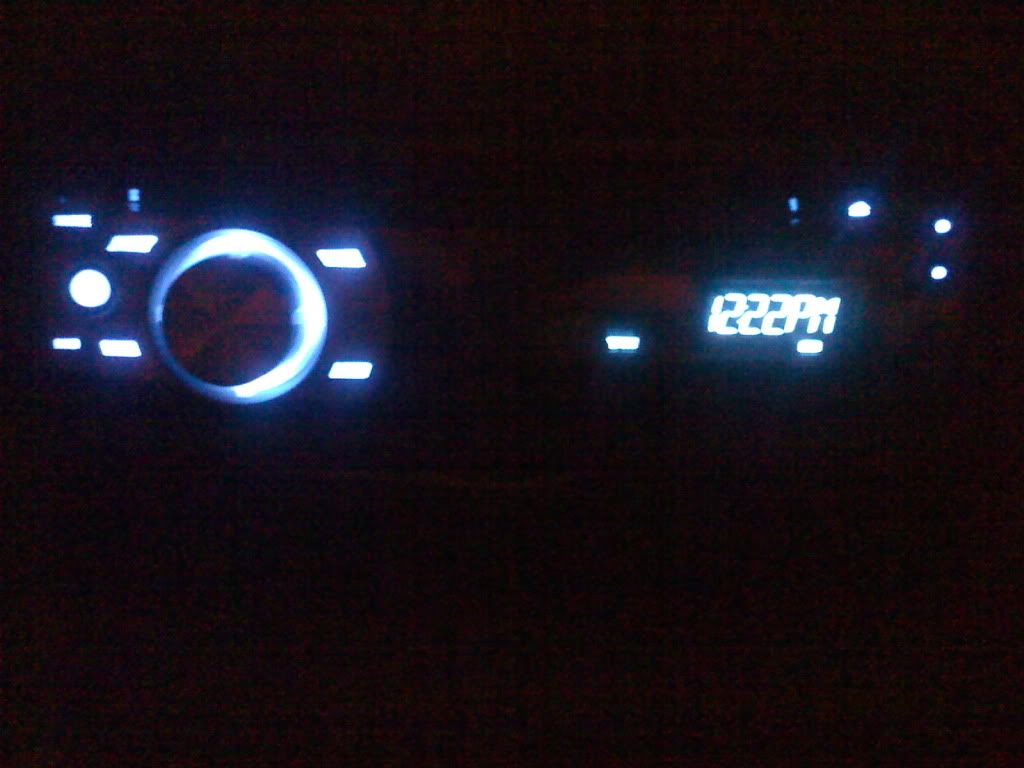
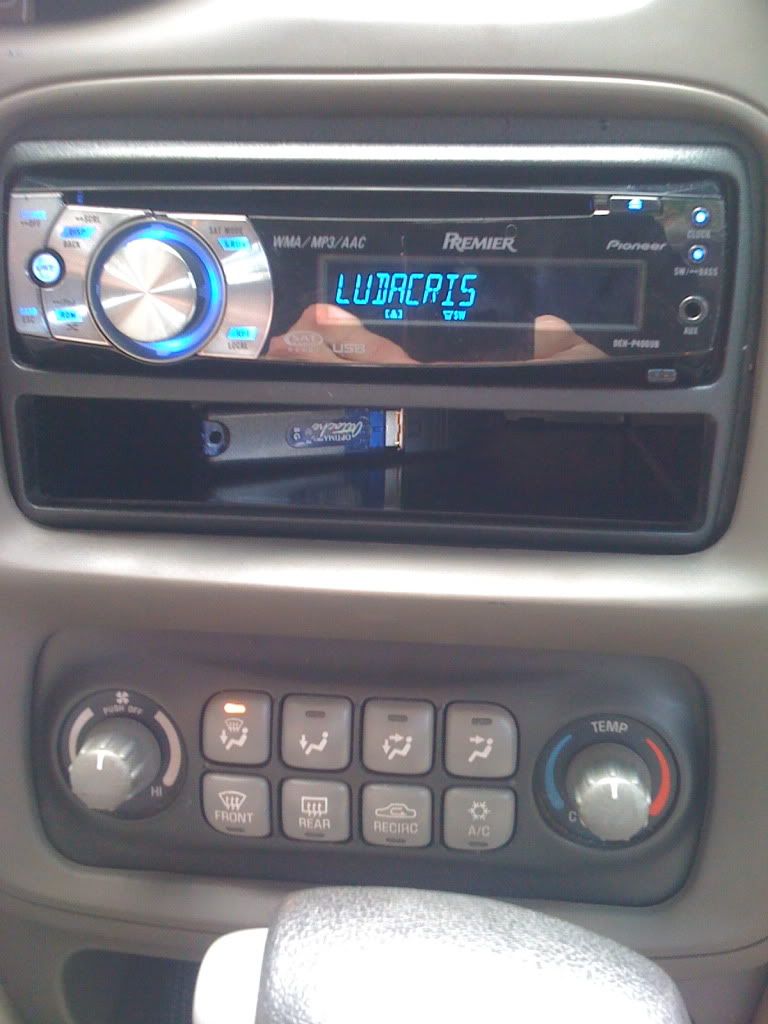
(Like the flash drive? it holds 8GB of music)
- I got self tapping screws put in there for the ground wires, and I did two seperate ones for each cord because I wasn't sure if it was OK for them to touch..
Also, that clock should read 1:32am lol
oh yeah and is it ok to have the ground wires touching? at the moment they aren't
Pictures:
(Like the flash drive?
- I got self tapping screws put in there for the ground wires, and I did two seperate ones for each cord because I wasn't sure if it was OK for them to touch..
Also, that clock should read 1:32am lol
Last edited by do9105 on Thu Jun 11, 2009 3:32 pm, edited 4 times in total.
Re: New Head Unit - How to Install Step-by-Step
Alright, so I got my headunit installed now I'm going to be installing some comp. speakers and an amp once I get the money. But until then I'm trying to do as much as possible to prepare for when I actually have it. So I was thinking about wiring the ACC (?) to the battery for when I get my amp to hopefully make the installation go quicker. My main question is how many amps should the fuse be? Because my headunit is 50W x 4 max power and 22W x 4 rms . So that comes down to about 5 amps (divide 50 by 12 to get the amps, right?).. So should I get a 5 amp fuse? or should I get a higher amp fuse for when I get the amp, so it matches the watts that the amp is pushing?
-
mntnbkr
- GXP Member
- Posts: 229
- Joined: Sun Mar 22, 2009 1:46 pm
- Year and Trim: '99 SSEi
- Location: Fenton, MI
Re: New Head Unit - How to Install Step-by-Step
Your wire from the battery should not have anything to do with your HU. It'll go directly from the battery to the amp, and should be fused based on the current draw from the amp. Your ACC (remote wire I'm assuming) wire will run from your HU to your amp, and will have nothing to do with your battery (for all intents and purposes). The ACC wire only tells the amp when to turn on and off based on teh status of the HU. It will probably already be protected by the fuse on the back of your head unit.
Last edited by mntnbkr on Wed Jul 01, 2009 4:04 pm, edited 1 time in total.
~Adam
'99 SSEi
'02 Volvo S60 AWD 2.4T
'02 Jeep Liberty Sport
'89 Chaparral 187XL w/ 4.3L I/O Mercruiser
'00 Cannondale Jekyll 900SX
Follow me on twitter: adumb
'99 SSEi
'02 Volvo S60 AWD 2.4T
'02 Jeep Liberty Sport
'89 Chaparral 187XL w/ 4.3L I/O Mercruiser
'00 Cannondale Jekyll 900SX
Follow me on twitter: adumb
Re: New Head Unit - How to Install Step-by-Step
then why is this saying to connect the power lead to the battery? im really confused about that part.
-
grandprix104
- Posts like an LN3
- Posts: 476
- Joined: Thu May 22, 2008 1:02 am
- Year and Trim: 2001 SE L36
- Location: Roy, Utah
- Contact:
Re: New Head Unit - How to Install Step-by-Step
On an amp the power lead (4-6ga wire usually 3/8-1/2" diameter) will connect directly to the battery. The remote lead (12-16ga thin wire usually blue in color) will go from the head unit to the amp to tell it to turn on. You will then have a ground wire same thickness/guage as the power lead that will either connect to the frame or the negative terminal on the battery. I chose to connect it directly to the battery since it is so close.
2001 Pontiac Bonneville SE 3.8n/a 110k, PLIM, APN UIM, 180 T-stat, Clarion DXZ385USB, Memphis 6.5s/6x9s/12" PR sub, Kicker ZX700.5 Amp.
1999 Jeep Grand Cherokee Limited 4.7 V8 120k, WAAG Brush Guard, 2in Lift, SkyJacker Shocks, HD front driveshaft, Infinity Tweeters, 12" Memphis sub, Rockford Fosgate Punch amp
1994 Pontiac Grand Prix 3100 180k SOLD :(
1999 Jeep Grand Cherokee Limited 4.7 V8 120k, WAAG Brush Guard, 2in Lift, SkyJacker Shocks, HD front driveshaft, Infinity Tweeters, 12" Memphis sub, Rockford Fosgate Punch amp
1994 Pontiac Grand Prix 3100 180k SOLD :(
-
mntnbkr
- GXP Member
- Posts: 229
- Joined: Sun Mar 22, 2009 1:46 pm
- Year and Trim: '99 SSEi
- Location: Fenton, MI
Re: New Head Unit - How to Install Step-by-Step
do9105, I'm a HUGE fan of do-it-yourself, in fact there are only a few things that I will pay to have someone else to do for me. However, unless I have a thorough understanding of what a project is going to require BEFORE I start, I DO NOT START the project.
With vehicle wiring, if connections are not made properly, wires are not fused correctly, and components are not "hooked up" as she should be, you can create a serious safety hazard without even knowing it. PLEASE take the time to READ and UNDERSTAND your manuals and installation guides, and DON'T skimp on things like taping your ground wires.
With that said, I am COMPLETELY willing to help you understand what you need to do in order to properly get your system installed. Please take a look at the following link whose shortcut on my desktop is aptly named "The Holy Grail of CAR Audio".
As for your question, the POWER lead does go to the battery using a 10 GA or larger power wire (based on the power requirement of your amp, and the length of the run). The ground can also be connected directly to the battery, but this is not the recommended method unless your battery is VERY close to where your amp is mounted. Otherwise, your ground should be as short as possible, and secured VERY WELL to a solid metal part of your vehicle. I like to use seat belt bolts when possible. The remote wire (blue wire from your head unit) will run from the HU to the amp and connect to the "remote turn-on" lead. This wire carries very little current and simply tells the amp when to turn on and off.
Last edited by mntnbkr on Sun Jul 12, 2009 11:09 am, edited 1 time in total.
~Adam
'99 SSEi
'02 Volvo S60 AWD 2.4T
'02 Jeep Liberty Sport
'89 Chaparral 187XL w/ 4.3L I/O Mercruiser
'00 Cannondale Jekyll 900SX
Follow me on twitter: adumb
'99 SSEi
'02 Volvo S60 AWD 2.4T
'02 Jeep Liberty Sport
'89 Chaparral 187XL w/ 4.3L I/O Mercruiser
'00 Cannondale Jekyll 900SX
Follow me on twitter: adumb
-
bonnieman17
- SE Member

- Posts: 23
- Joined: Wed Apr 22, 2009 9:11 pm
- Year and Trim: 2004 SE
Re: New Head Unit - How to Install Step-by-Step
whats the best tool everyone used to cut out the plastic?

-
mntnbkr
- GXP Member
- Posts: 229
- Joined: Sun Mar 22, 2009 1:46 pm
- Year and Trim: '99 SSEi
- Location: Fenton, MI
Re: New Head Unit - How to Install Step-by-Step
I always use a dremel.
~Adam
'99 SSEi
'02 Volvo S60 AWD 2.4T
'02 Jeep Liberty Sport
'89 Chaparral 187XL w/ 4.3L I/O Mercruiser
'00 Cannondale Jekyll 900SX
Follow me on twitter: adumb
'99 SSEi
'02 Volvo S60 AWD 2.4T
'02 Jeep Liberty Sport
'89 Chaparral 187XL w/ 4.3L I/O Mercruiser
'00 Cannondale Jekyll 900SX
Follow me on twitter: adumb
-
bonnieman17
- SE Member
- Posts: 23
- Joined: Wed Apr 22, 2009 9:11 pm
- Year and Trim: 2004 SE
Re: New Head Unit - How to Install Step-by-Step
Is there any way to hook up the adio with out goin through the lights

Re: New Head Unit - How to Install Step-by-Step
can you please fix the pictures in this thread?
someone is looking for some help
thanks
samz
someone is looking for some help
thanks
samz
Cardomain link

Fully tinted, 5000K HID hi/lo & fogs, LED conversion (interior/red rear signals/reverse light/license plate/trunk/sun visor/glove box/switch backs), turn signal mirrors, JVC KW-NT3 Navi & BT, KV-CM1 Camera, 2x JL 13TW5, JL G-Max, black & chrome emblem, 20" black & red, clear corners, center tail light up, half tinted tail lights, cross drilled rotors, Hawk ceramic pads, and more..
Black GXP. One of a kind. RIP.
G35 Coupe 6MT. Stockishhh
-
grandprix104
- Posts like an LN3
- Posts: 476
- Joined: Thu May 22, 2008 1:02 am
- Year and Trim: 2001 SE L36
- Location: Roy, Utah
- Contact:
Re: New Head Unit - How to Install Step-by-Step
Sorry, my domain is down at the moment. I will try to get another solution up soon.
2001 Pontiac Bonneville SE 3.8n/a 110k, PLIM, APN UIM, 180 T-stat, Clarion DXZ385USB, Memphis 6.5s/6x9s/12" PR sub, Kicker ZX700.5 Amp.
1999 Jeep Grand Cherokee Limited 4.7 V8 120k, WAAG Brush Guard, 2in Lift, SkyJacker Shocks, HD front driveshaft, Infinity Tweeters, 12" Memphis sub, Rockford Fosgate Punch amp
1994 Pontiac Grand Prix 3100 180k SOLD :(
1999 Jeep Grand Cherokee Limited 4.7 V8 120k, WAAG Brush Guard, 2in Lift, SkyJacker Shocks, HD front driveshaft, Infinity Tweeters, 12" Memphis sub, Rockford Fosgate Punch amp
1994 Pontiac Grand Prix 3100 180k SOLD :(
-
grandprix104
- Posts like an LN3
- Posts: 476
- Joined: Thu May 22, 2008 1:02 am
- Year and Trim: 2001 SE L36
- Location: Roy, Utah
- Contact:
Re: New Head Unit - How to Install Step-by-Step
Back online again  I'm still planning to revise this too, but havn't had time yet.
2001 Pontiac Bonneville SE 3.8n/a 110k, PLIM, APN UIM, 180 T-stat, Clarion DXZ385USB, Memphis 6.5s/6x9s/12" PR sub, Kicker ZX700.5 Amp.
1999 Jeep Grand Cherokee Limited 4.7 V8 120k, WAAG Brush Guard, 2in Lift, SkyJacker Shocks, HD front driveshaft, Infinity Tweeters, 12" Memphis sub, Rockford Fosgate Punch amp
1994 Pontiac Grand Prix 3100 180k SOLD :(
1999 Jeep Grand Cherokee Limited 4.7 V8 120k, WAAG Brush Guard, 2in Lift, SkyJacker Shocks, HD front driveshaft, Infinity Tweeters, 12" Memphis sub, Rockford Fosgate Punch amp
1994 Pontiac Grand Prix 3100 180k SOLD :(
-
Psychotic
- LE Member
- Posts: 1
- Joined: Sat May 22, 2010 1:14 pm
- Year and Trim: 2002 Pontiac Bonneville
Re: New Head Unit - How to Install Step-by-Step
Hey guys, I didn't see the issue discussed so I have a quick Q.
I am installing Dual XDMA6330 receiver. I have made my own harness that hooks right up to the factory harness and then to the deck so I can put the old deck back later. Once I hook everything up, I will get the security light blinking and the deck accepts cds, but the face plate will not turn on. Any idea on what mistake I made?
I am installing Dual XDMA6330 receiver. I have made my own harness that hooks right up to the factory harness and then to the deck so I can put the old deck back later. Once I hook everything up, I will get the security light blinking and the deck accepts cds, but the face plate will not turn on. Any idea on what mistake I made?
-
Bugsi

- Resident Gearhead

- Posts: 2405
- Joined: Wed May 21, 2008 7:36 pm
- Year and Trim: (RIP 10/31/15) 1997 SE
05 Mercedes S500 4Matic - Location: Sunnyvale, CA
Re: New Head Unit - How to Install Step-by-Step
Holy old thread revival, Batman!
-When you have a new question, you should start a new thread.
-When you have a new question, you should start a new thread.
PontiacDad at WCBF `08: "By any chance, was his name. . .Radomir?"
R.I.P. 10/31/15: 1997 SE: "Silver Shadow"
`05 Mercedes S500
R.I.P. 10/31/15: 1997 SE: "Silver Shadow"
`05 Mercedes S500
-
viper79

- SSEi Member

- Posts: 182
- Joined: Wed Jul 21, 2010 1:38 pm
- Year and Trim: 2000 Galaxy Silver SE no mods
Re: New Head Unit - How to Install Step-by-Step
Wire Harness = PAC C2R-GM32R for 00 and above. NON BOSE
Last edited by viper79 on Tue Jul 27, 2010 1:19 am, edited 1 time in total.
Re: New Head Unit - How to Install Step-by-Step
hey can you load the pictures again or can you email them to me? i'm ab out to attempt this myself and it would be great to have the pictures.
-
Liability
- SE Member
- Posts: 21
- Joined: Sun Sep 04, 2011 1:53 am
- Year and Trim: 2000 Bonneville SE, Bronzemist
Re: New Head Unit - How to Install Step-by-Step
im in the same boat.. i need the "if mounting right side up, cut the green lines" picture.... anyone????
-
statikregimen
- LE Member
- Posts: 3
- Joined: Fri Nov 02, 2012 2:43 pm
- Year and Trim: 2004 SE
Re: New Head Unit - How to Install Step-by-Step
+1 for fixing the images =/