1. Make sure it really is your water pump before continuing. Get a mechanics mirror and check under and behind the pump to check for leaking. This can happen when it is hot, when it is cold, running or not!
2. Once that has been determined wait until your car has cooled down and remove your radiator cap. Drain your coolant. What I did was run a 1/4 inch tube as far down inside my radiator as possible and siphoned it into my oil catch pan. You're going to change it anyway so it doesn't matter if it is spoiled or not. This will take a little while so go make a cup of coffee or grab a beer. Put the radiator cap back on to avoid the possibility of an "oh shoot" moment!
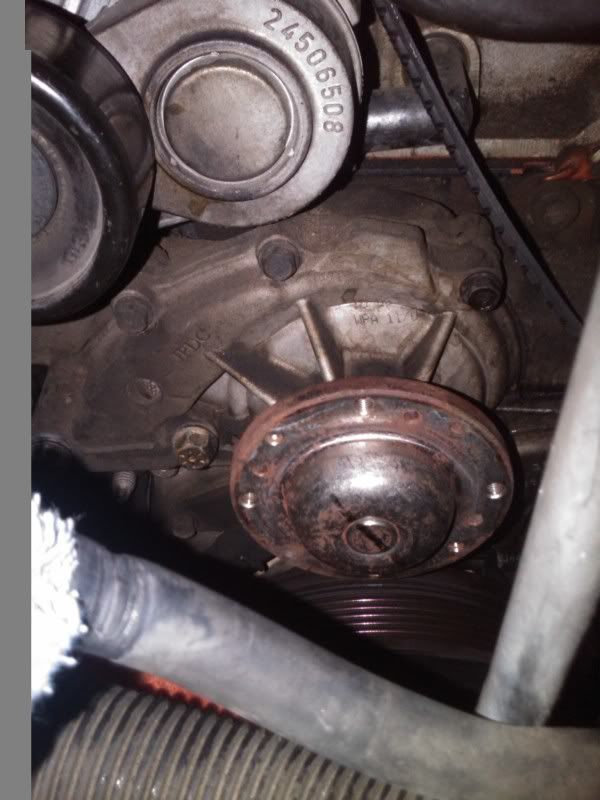
3. Now that the coolant is drained I removed the overflow coolant container (not proper name I know) so that I had more room to work. This has 2 nuts and 1 screw to remove and then the connector for the hose. Hint - use the same method as above to drain coolant from this but beware there will still be a little bit of coolant so use some towels or drop clothes to catch the residual. Here is a picture of the water pump before starting removal.
4. Loosen the 4 bolts on the water pump pulley while the belt is still on so that it has the pressure of the belt on it otherwise it will just spin on you but don't try to remove.
5. Remove both belts using their respective tension pulleys (refer to picture above in this post for their names and locations). Also, remember to make a drawing of the path for later reference if you don't have a manual or any other means of reference to reinstall.
6. Finish removing bolts from water pump pulley and remove the pulley.
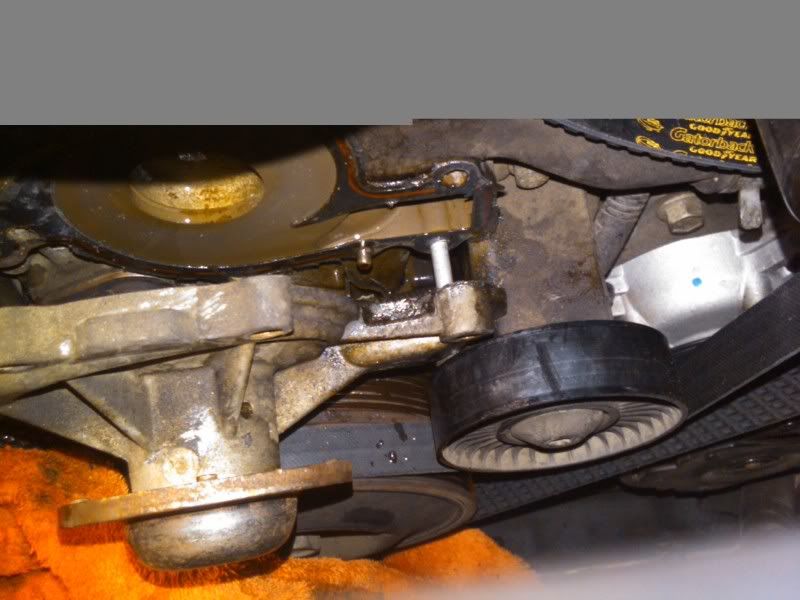
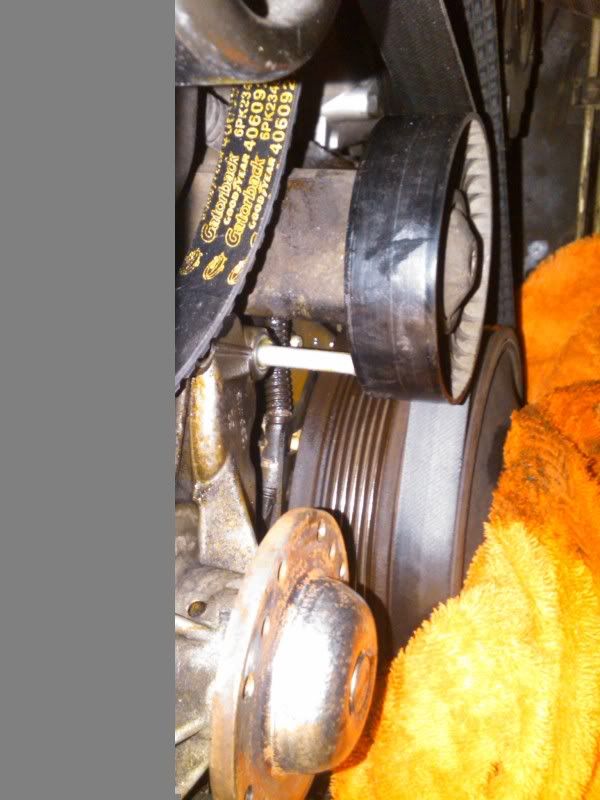
7. Remove 4 large bolts and 4 small bolts from the water pump. There will be residual coolant from each large bolt so be aware and put the oil catch pan underneath this area to avoid spillage. Below is a couple of pictures of an issue I had with the lower right large bolt. The idler pulley was in the way so it has to be removed before you can remove the bolt (see the pics below - the whitish bolt in the middle of the picture) and the rest of the water pump. Another tip that would have helped me greatly, it is regular thread so lefty loosy and it was not easily removed. I applied a good amount of pressure on the torx bit with an extension bar and it finally let go after a few seconds.
8. Once the idler pulley was removed the water pump still required a little urging with a whack or two from a hammer to free it and remove it.
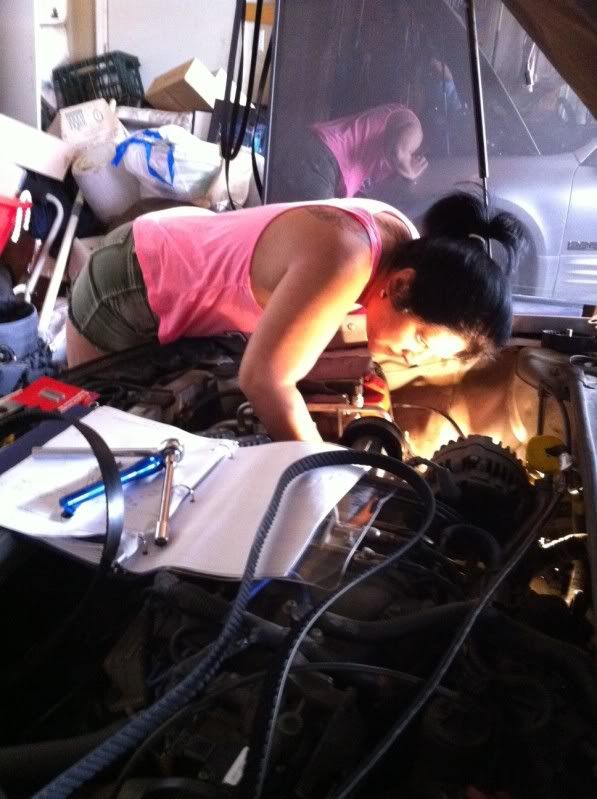
9. Then the gasket clean up began. Mine was baked on the engine side of course so my grease monkey assistant went to work and diligently cleaned it to perfection. She is that way...Here she is...beautiful and handy as well!!
10. Once the mating surface was free of all remaining old gasket we proceeded to install new water pump gasket and water pump. We went with the suggested upgraded S1 pump and pulley combo. Using the blue thread lock, as stated earlier in this thread, I proceeded to hand each one to my lovely assistant and she proceeded to snug up each one so that they could be torqued to the proper specs (again see the numbers from an earlier posting in this thread - 22 ft lbs large bolts, 11 ft lbs small bolts)
11. Once the water pump is installed and torque then reinstall the idler pulley and torque to proper specs (can't remember right off the top - 112 ft lbs I think) I couldn't really do this to well because of the clearance and not having the proper tools so be aware that the clearance is minimal.
12. Reinstall the belts in their proper configuration referencing your earlier drawing or other reference material.
13. Now that the water pump has been changed you can reinstall the overflow coolant reservoir with the 2 nuts and 1 screw remembering to reconnect the tube with the spring clamp or screw clamp.
14. Next step is to remove and change out the thermostat. I don't have a picture of this but I can get one if you need it just PM me or anybody here. It is on top of the engine and has the upper radiator hose running to it. It has 2 bolts that need to be removed. Take off the cover and remove the thermostat. When purchasing new thermostat mine did not come with the rubber gasket so check before you leave the store. I replaced both because the gasket was shot. Poor 50/50 coolant directly into the hole to fill LIM and block. Reinstall the cover and torque as needed (don't remember if it was needed or not).
15. Remove radiator cap and fill with new 50/50 coolant. This is where I had another issue that I wasn't aware of. Since you have had everything removed you have introduced air into the system so this air has to be purged or the coolant won't reach the thermostat to make it work. Once you have filled your radiator with coolant and put the cap back on start the car and let it idle until it gets up to temperature. On top of the thermostat cover are two nuts, while holding a wrench on the bottom one turn the top one counter clockwise to release the escaping air until you get a steady stream of coolant. Monitor your temp gauge inside to make sure it doesn't overheat during this phase. Mine seemed to take forever and I never did get a steady stream until I shut it down and checked the coolant level in the radiator. I restarted the car and added coolant to the top of the reservoir and then put the cap back on repeated the purging process and immediately got a steady stream. Note to self...remember to make sure you have enough coolant in the reservoir!!
16. Tightened up the purge screw, hosed down the engine where the coolant was spraying all over and then proceeded to test drive. Temp was a consistent 200 or below...success!!
If anybody could add a list of the bolt sizes for the water pump, torx bit size for the idler pulley that would be greatly appreciated and I hope this helps someone else feel a little bit more comfortable with the install. It is not difficult as long as you know all the little bumps along the way!!